It has been way too long that I have publicly released a new version of the Vrui VR toolkit. The main issue was that I had been chasing evolving hardware, from the Oculus Rift DK1 to the Oculus Rift DK2, and now to HTC’s Vive. During that long stretch of time, I was never happy with the state of support of any of these devices.
That’s finally changed. I have been working on full native support for HTC’s Vive head-mounted display over the last few months (with the first major break-through in May), and I think it’s working really well. There are still a lot of improvements to make and sharp edges to sand off, but I feel it is worthwhile releasing the software as it is now to get some early testing done. So without much further ado, here is Vrui-4.2-004.
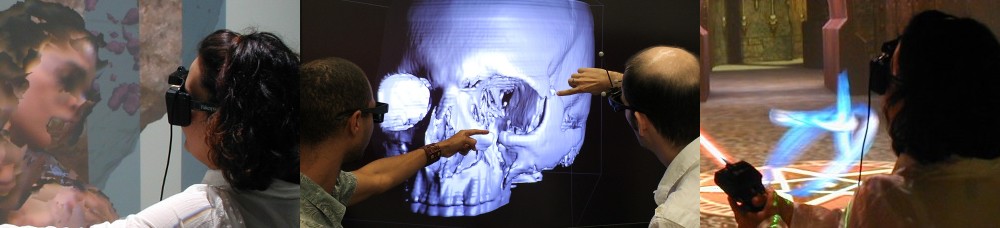
Figure 1: Vrui’s ClusterJello toy application running on an HTC Vive head-mounted display. Recorded using a second-generation Microsoft Kinect camera (Kinect-for-Xbox-One).
A lot has changed since the last major public release, Vrui-3.1-001, almost three years ago (there was a minor update last November, but still…). I’ll write up detailed release notes at some later time, but for now, let’s do a quick run-down on how to download and install Vrui, and, most importantly I assume, how to get it to work with the Vive.
Preparations
Vrui uses the lower levels of Valve’s OpenVR SDK and SteamVR run-time to receive 6-DOF tracking data and controller events from the Vive and its Lighthouse tracking system. Before installing Vrui, one therefore has to install the Linux versions of Steam and SteamVR.
How to get Steam depends on the Linux distribution. On Fedora, there is a “steam” package in the RPMFusion repositories, so getting it is as simple as
$ sudo dnf install steam
Ubuntu and Linux Mint most probably have Steam packages as well, but I don’t know right now what they’re called. Hit the Googles.
After Steam is installed, start it, wait for updates to complete, and then log in with a valid Steam account. Next, download SteamVR from the “Tools” menu. When that’s complete, you’re done with Steam for the moment. Don’t try starting SteamVR, it doesn’t work right now anyway.
Downloading and Installing Vrui
Vrui has a handy installation script, one version for Fedora, and one for Ubuntu/Linux Mint. Here is how to get and run it from a terminal window:
$ cd
$ wget http://idav.ucdavis.edu/~okreylos/ResDev/Vrui/Build-Ubuntu.sh
$ bash Build-Ubuntu.sh
The script (if you’re on Fedora, replace Build-Ubuntu.sh with Build-Fedora.sh) will download and install a bunch of tools and libraries (such as g++ or libjpeg) from your distribution’s repositories, and then download, build, and install Vrui itself. It might ask for your password to make system-level changes at a few points — specifically, to install dependency packages, to install Vrui into /usr/local, its default installation directory, and to install custom device permission rules in /etc/udev/rules.d (see below). The entire process usually takes only a few minutes. The entire Vrui source package is downloaded into ~/src/Vrui-<version>-<release>, e.g., ~/src/Vrui-4.2-004. If you want to uninstall Vrui later, run from a terminal:
$ cd ~/src/Vrui-4.2-004
$ sudo make uninstall
Non-Standard SteamVR Locations
The Build-* scripts assume that SteamVR is installed somewhere inside the current user’s home directory, and contain code to find it automatically. If they fail, or if SteamVR is installed somewhere else, support for Vive tracking will be disabled (this is indicated towards the end of the configuration messages printed when building Vrui).
If SteamVR support was disabled, you can enable it manually by providing the path to SteamVR’s root directory when running “make” and “make install”:
$ cd ~/src/Vrui-4.2-004
$ make STEAMVRDIR=/path/to/SteamApps/common/SteamVR
$ sudo make STEAMVRDIR=/path/to/SteamApps/common/SteamVR install
This will only rebuild the OpenVRHost device driver module, and be very quick.
Installing Udev Rules
Talking to non-standard devices such as the Vive usually requires administrator privileges. That’s annoying and unnecessary, and Vrui contains rules to relax the permissions on such devices for the user currently logged in at the console. These rules are installed automatically by the Build-* scripts, but if you built Vrui manually, you install them by running from a terminal:
$ cd ~/src/Vrui-4.2-004
$ sudo make installudevrules
(and enter your password if prompted). This will create a new file, 69-Vrui-devices.rules, in /etc/udev/rules.d. If you do not install these rules, you need to run the RunViveTracker.sh script as root, e.g., through sudo. This is not recommended.
After installing the rules, temporarily unplug the power connector to the Vive’s breakout box, and plug it back in. This will apply the new rules to it.
Testing the Tracking Driver
During installation, Vrui created a helper script, RunViveTracker.sh, and installed it into /usr/local/bin. Vrui’s actual tracking driver is called VRDeviceDaemon, and it is also installed in /usr/bin/local, but do not run VRDeviceDaemon directly. Loading OpenVR’s Lighthouse driver module requires a special environment, and RunViveTracker.sh sets that up. Open a new terminal window, and run:
$ RunViveTracker.sh
If all goes well, this will print a rather large volume of debug and diagnostic messages, including a ton of “ioctl (GFEATURE): Broken pipe” messages that are safe to ignore, and then just sit there. To stop the tracking driver later, press Ctrl-C. To test tracking, open another terminal window and run:
$ DeviceTest localhost:8555 -t 0 -p
DeviceTest is a Vrui utility that connects to a running tracking server (called VRDeviceDaemon, and listening to TCP port 8555 on the local machine) and prints tracking and button/valuator (analog axis) data. When run as above, it will continuously print the position of the Vive HMD. To exit from DeviceTest, press any key.
To test controller tracking, turn on one or both of the controllers, and run
$ DeviceTest localhost:8555 -t 1 -p -b
which will print the position of the first controller, and the states of both controllers’ buttons.
Setting Up the Tracking Environment
Before you can run Vrui applications using the Vive, you need to set up the tracking environment. This is basically the same step as “room-scale setup” in SteamVR. From a terminal, run
$ RoomSetup Vive
This starts a graphical configuration utility. In the beginning, it will show some random environment definition, and a dialog window with multiple pages. Room setup proceeds in a sequence of steps:
Controller
On the “Controller” page, select your controller type from the drop-down menu. You’ll probably want “Vive.” This defines measurement offsets for the later steps.
Floor Plane
The “Floor Plane” page sets up the environment’s “up” direction and its floor plane. First, push the “Reset” button, and then place your controller on the ground in the middle of your VR space, so that the tracking “donut” touches the ground, and the buttons and touchpad face up. Then press any button on the controller. The dialog window will update to show the position of the new center point, and a default “up” direction of 0.000, 1.000, 0.000. In most cases, that’s all it takes.
Should you later notice that virtual environments appear tilted, you can calibrate the “up” direction by re-doing the floor plane step, and measuring additional points from around your floor by touching the floor with the front of the tracking donut, and pressing a controller button. This will calculate the plane that best fits the points you collected, and calculate the “up” direction such that it is orthogonal to that plane.
Forward Direction
Vrui needs a notion of a “forward direction,” which is the typical direction you’re facing when standing in your VR space. To define it, point a controller in the direction you want, and press a button.
Boundary Polygon
The final setup step is to define the boundaries of your physical VR space. While VR applications are running, Vrui will continuously check the positions of the HMD and all controllers against those boundaries, and show a “screen saver” grid when any come close.
To define a polygon, first press the “Reset” button, and then walk around your VR space and touch every corner of the accessible space with the front edge of one controller’s tracking donut, and press some button on the controller. You can see the boundary polygon updated in RoomSetup’s display window.
You can zoom and pan inside RoomSetup’s window to inspect parts of your polygon. Roll the mouse wheel to zoom, and press and hold the “z” key, and then move the mouse without pressing any buttons, to pan. Should the display ever get out of whack, press Win+Home, or right-click the mouse and select “View” -> “Reset View” from the Vrui System Menu, to reset it.
Saving the Current Setup
You can go back and fix other components of the setup, such as floor plane or forward direction, any time during setup. Once you are satisfied with your setup, save it by pressing the “Save Layout” button, and exit RoomSetup by closing the window, or pressing Esc.
Turning on the Vive’s Display
The Vive’s display should have turned itself on when you plugged it in. If it didn’t, open your display control panel (if you have an Nvidia graphics card, run nvidia-settings), and set it up manually. Make sure that you select a resolution of 2160×1200 pixels, and a refresh rate of 90Hz.
Vertical Retrace Synchronization
It is very important that rendering to a head-mounted VR display is synchronized with the display’s vertical retrace period, otherwise there will be tearing and horrible judder. How to enable this depends on the graphics driver used, and the way how the Vive’s display is set up in the X server. An easy way to check whether synchronization is working is to put on the HMD — unless everything is smooth, it’s not synchronized. An additional way is to press Win+Pause while a VR display window has input focus. This will collect frame rate information and print a summary when Win+Pause is pressed again. The printed frame rate should be close to 89.5 Hz (the Vive’s true frame rate).
If the Vive is connected as a secondary X screen, vertical retrace synchronization should work out-of-the-box.
If the Vive is connected as an extended display (“TwinView” in Nvidia parlance), there may need to be some additional steps. Using Nvidia’s proprietary drivers — which I am using on all my computers — there is an environment variable that needs to be set to tell OpenGL to which display to synch (OpenGL could figure this out by itself based on the position of the window asking for synch, but Nvidia never implemented that). First, find out the display connector name of the Vive’s display, most easily through nvidia-settings. This is going to be something like DFP-1 or DFP-2. Then, before running a Vrui application from a terminal window, enter
$ export __GL_SYNC_DISPLAY_DEVICE=DFP-1
into that terminal window, replacing DFP-1 with the actual name from nvidia-settings.
Testing Vrui
That was basically it. You can now run any Vrui application in the Vive. Vrui contains a number of small example programs, mostly meant to get developers started on creating Vrui applications. The Build-* scripts automatically built and installed them, but if you built Vrui manually, go into the ExamplePrograms directory and run make:
$ cd ~/src/Vrui-4.2-004/ExamplePrograms
$ make INSTALLDIR=/usr/local
$ sudo make INSTALLDIR=/usr/local install
Then run one of them like this:
$ ClusterJello -rootSection Vive
The -rootSection Vive option tells Vrui to run in the Vive. If you leave it off, Vrui will run in desktop mode (you can make Vive mode the default later).
ClusterJello is a silly toy application. It shows a block of lime green Jell-O on the floor. To interact with the block, press some button on a controller, and select “Dragger” -> “6-DOF Dragger” from the tool selection menu that pops up. Then reach down and grab the block by pressing and holding the same button.
You can change the behavior of the Jell-O by pressing and holding the controller’s menu button, and selecting “Show Settings Dialog.” Use the menu button to interact with that dialog, and press the “X” button to dismiss it.
To exit from the program, select “Quit Program” from the Vrui system menu.
Note: Do not run the “Jello” application. Virtual Jell-O comes in three flavors, to highlight different aspects of the Vrui VR toolkit. Jello is a very simple application that will run the Jell-O simulation inside the application’s main loop, which means it will not hit target frame rate in most cases, and look and feel very choppy. ClusterJello is a more advanced version of the same that runs the Jell-O simulation in a background thread, so it will always run at the display’s native frame rate. SharedJello is a distributed application that allows multiple users, each from their own VR environment, to play together with the same block of Jell-O. It is client/server based, with SharedJelloServer being another Vrui example program.
Next Steps
This is a preliminary release of Vrui with Vive support. There are still a lot of improvements to be made. Latency, smoothness, tracking stability, etc. are not necessarily up to snuff. Probably most importantly, Vrui does not yet receive notifications when the headset loses tracking. Meaning, should this happen, the VR display will get very wonky. I’m working on that part.
Figure 2: Another Vrui application running on an HTC Vive head-mounted display. Recorded using a second-generation Microsoft Kinect camera (Kinect-for-Xbox-One).

Thanks for this great guide for setting up Vive with Vrui in linux. I have run through all the steps and made sure that STEAMVRDIR is set to my SteamVR path, but I am not getting tracking from my headset or controllers. The output is like this:
DeviceTest localhost:8555 -t 1 -p -b
Pos X Pos Y Pos Z ( 0.000 0.000 0.000) . . . . . . . . . .
And then no updates on the position. Any ideas of what I can try?
The most common reason for this is that the headset and/or controllers don’t get scanned by the Lighthouse base stations. First check that your base stations are powered and running, are synchronized, and that the headset is visible to both base stations.
When you start RunViveTracker.sh, you should see notifications about the base stations a few seconds later. You should be seeing output similar to this:
OpenVRHost: Log message: LHR-8F706079 H: basestation transmission profile (ootx) selected, max basestations: 2OpenVRHost: Log message: LHR-8F706079 H: tdm sync acquired
OpenVRHost: Log message: Base FECC7EA7 observed
OpenVRHost: Log message: Base 00BF444F observed
OpenVRHost: Log message: LHR-8F706079 H: ----- BOOTSTRAPPED base 00BF444F (best) distance 3.99m velocity 0.04m/s base pitch ~48.4 deg roll ~-6.1 deg -----
OpenVRHost: Log message: LHR-8F706079 H: ----- CALIBRATED base 00BF444F at pitch 46.92 deg roll -7.80 deg -----
OpenVRHost: Log message: Updating tilt for 00BF444F.26. Old= 47.27, -7.17, 39.4784 <- 0.65 deg -> new= 46.92, -7.80, 7.72735e-06 result=46.92, -7.80, 7.72735e-06
OpenVRHost: Log message: LHR-8F706079 H: ----- SECONDARY base FECC7EA7 distance 2.22m -----
OpenVRHost: Log message: LHR-8F706079 H: ----- RELATIONSHIP bases 00BF444F <-> fecc7ea7 distance 4.53m, angle 176.56 deg -----
OpenVRHost: Log message: Moving base 00BF444F 19mm and 0.2 deg because of relationship with FECC7EA7, which is closer to the origin
OpenVRHost: Log message: Updating tilt for FECC7EA7.5. Old= 45.46, -3.18, 3.53091e-06 <- 0.63 deg -> new= 45.74, -2.55, 8.34527e-05 result=45.74, -2.55, 8.34527e-05
Thanks, I had the base stations set up incorrectly.
Hi Kreylos,
Great work and special thanks for sharing your insights all along! Your latest medical data visualization using vrui/vive is yet again impressive 🙂
Going by your ‘Vrui la Vive’ blog/reddit discussions and the blog of ‘Seegras’, our installtion has gone smooth until ‘Testing the Tracking Driver’:
——-
>RunViveTracker.sh
:/usr/lib/x86_64-linux-gnu:/home/jranga0/.steam/ubuntu12_32/steam-runtime/amd64/lib/x86_64-linux-gnu:/home/jranga0/.steam/ubuntu12_32/steam-runtime/amd64/usr/lib/x86_64-linux-gnu:/home/jranga0/.steam/steam/steamapps/common/SteamVR/drivers/lighthouse/bin/linux64
VRDeviceDaemon: Reading configuration file
VRDeviceDaemon: Initializing device manager
VRDeviceManager: Loading device Vive of type OpenVRHost
VRDeviceDaemon: Caught exception OpenVRHost: Unable to retrieve server-side driver object due to OpenVR error 105 while initializing VR devices
——-
Error seem to come from VRDeviceDaemon.cpp Line 228
Any hint/solutions would be greatly appreciated.
>>Setting up HTC Vive in a Linux Ubuntu 16.04 LTS – Intel Xeon(R) 2.60 GHz x16 – 64 bit machine with Geforce GTX 1080 – pascal. Application: medical image visualization at our University
The following installations seem ok
> Steam
> >Vrui-4.2-006
> Udev Rules
Thanks for your time.
jrr
Valve recently pushed an OpenVR update, which probably broke the internal ABI and my Vrui VRDeviceDaemon adapter. I’ll have to sort that out again once I get a chance.
Thanks for your response. That must be annoying…take your time to post an update and I shall keep an eye to give a try again.
Is there an older version of OpenVR we can download to make it work in the meantime? Or is it that once they post an update, the older versions are no longer available?
@jrr you can probably build an older version of steam from source: https://github.com/ValveSoftware/openvr/releases/tag/v1.0.5
Hi jrr,
This is for people having trouble with Vrui-4.2-006 and steamvr 1.0.3 and after.
I was able to get part of the program working. But I have a very weird problem with the vive display not turning on.
Here is what I did, I did all the installation process up until “Testing the Tracking Driver”. Then because of the OpenVR error 105, I used a SteamCMD mentioned here: https://github.com/OSVR/OSVR-Vive/issues/20 to download an earlier version of steamvr driver files. Then I just did a copy/replacement of the newest steamvr files installed by steam client. After that, I did RunViveTracker.sh and everything actually worked. I was able to complete room setup.
But then I noticed that the vive headset did not turn on. The little red led dot on the left side of the headset is red. I tried to run the jello program, all the tracking and controllers work, I can see the jello scene on my computer screen. But the headset screen is still off.
Another weird thing is if I press ctrl-alt-f1 to go to x terminal. The headset will turn on, I can see the screen in the headset, the led is green. But as soon as I hit ctrl-alt-f7 to exit x terminal, the headset turns off…
EDIT:
nvidia-settings did not detect the headset display Testing the headphone jack works
EDIT 2:
I switched from my NVIDIA driver from 378.13 to 375.39 and the headset display is working!!!
To anyone who is coming from google with Vrui having OpenVR error 105, use steam to install steamvr, but use the steamCMD tool to download an older version of steamvr, specifically mentioned here https://github.com/OSVR/OSVR-Vive/issues/20
For linux, that would be
download_depot 250820 250823 9183475244149741279
use the downloaded files to replace the files in steamvr
Make sure in Software&Updates / Additional Drivers you are running on nvidia-375
@Ray Thank you!
Works fine for me with old driver.
Ray, I am following your instructions but cannot get it to work as the libSDL of the older SteamVR version is compiled for 32-bit only. See this GitHub Issue for details: https://github.com/KeckCAVES/Vrui/issues/6
We appreciate the work that you’ve put into this and your willingness to share. We have the same issue with our install that jrr has reported.
Pingback: VR medical visualization with 3D Visualizer | Doc-Ok.org
/usr/bin/ld: cannot find -lMisc.g++-3 While compiling:
On Ubuntu 16.04. When Build-Ubuntu.sh gets to linking it fails with the following output:
Linking /mnt/sdcard/VRUI/src/Vrui-4.2-006/lib/libRealtime.g++-3.so.4.2…
Linking /mnt/sdcard/VRUI/src/Vrui-4.2-006/lib/libThreads.g++-3.so.4.2…
/usr/bin/ld: cannot find -lMisc.g++-3
collect2: error: ld returned 1 exit status
/mnt/sdcard/VRUI/src/Vrui-4.2-006/BuildRoot/BasicMakefile:198: recipe for target ‘/mnt/sdcard/VRUI/src/Vrui-4.2-006/lib/libThreads.g++-3.so.4.2’ failed
make: *** [/mnt/sdcard/VRUI/src/Vrui-4.2-006/lib/libThreads.g++-3.so.4.2] Error 1
make: *** Waiting for unfinished jobs….
/usr/bin/ld: cannot find -lMisc.g++-3
collect2: error: ld returned 1 exit status
/mnt/sdcard/VRUI/src/Vrui-4.2-006/BuildRoot/BasicMakefile:198: recipe for target ‘/mnt/sdcard/VRUI/src/Vrui-4.2-006/lib/libRealtime.g++-3.so.4.2’ failed
make: *** [/mnt/sdcard/VRUI/src/Vrui-4.2-006/lib/libRealtime.g++-3.so.4.2] Error 1
Build unsuccessful; please fix any reported errors and try again
Turns out the SD I was writing to was formatted fat not ext3. Reformatted and everything is working great now.
Thanks for following up. Your issue had me stumped, now I know what to tell people in the future.
Not a problem. It was driving me crazy too! I was working through the directory structure and everything was there, but it was just failing on link every single time.
Turns out (obviously now) that because FAT doesn’t support owner, permissions, and symbolic links it’ll never let it build properly.
Thanks for all the hard work sorting this package all out!
Gah, that didn’t even occur to me.
Interesting piece of software.
The view looks distorted is that normal how do I change that? also I’ve got lines of desktop, how do i fix that?
Also the green lines for the bounding box and the white lines are misaligned how can I fix that. or do they mean different things.
I’ve followed the instructions fine until the ‘RunViveTracker’ part which fails with the following:
VRDeviceDaemon: Reading configuration file
/usr/local/bin/VRDeviceDaemon: relocation error: /usr/local/lib/x86_64-linux-gnu/Vrui-4.2/libMisc.g++-3.so.4: symbol _ZNSt7__cxx1112basic_stringIcSt11char_traitsIcESaIcEE10_M_replaceEmmPKcm, version GLIBCXX_3.4.21 not defined in file libstdc++.so.6 with link time reference
The build process worked, I can see it picked up Steam and I got the spinning globe at the end.
I’m having the exact same issue on Ubuntu 16.04. Will try 17.04 maybe to see . . .
Setting Up the Tracking Environment:
$RoomSetup Vive
Error:
Terminated RoomSetup due to exception: Unable to convert
Help please!
When you change the values on graphical configuration utility, which file does it create or change?
The default Vrui installation creates per-user configuration files in
~/.config/Vrui-<version>. RoomSetup will create/modify~/.config/Vrui-<version>/Vrui.cfg.During Vrui startup, the run-time will read the system-wide configuration file (in the default installation
/usr/local/etc/Vrui-/Vrui.cfg ), and then patch in the per-user configuration file. You can see exactly which files are tried if you add-vruiVerboseto the command line of any Vrui application, including RoomSetup itself.Thank you! i fixed it.
What’s the full error message? It should say what it wasn’t able to convert into what.
Does anyone know if this works with newer drivers? Having a bit of trouble going back that far on my system with all the new kernel updates. Alternatively, can someone who is using 375.39 please post the kernel version they’re using?
When running RunViveTracker.sh:
VRDeviceDaemon: Reading configuration file
VRDeviceDaemon: Initializing device manager
VRDeviceManager: Loading device Vive of type OpenVRHost
VRDeviceDaemon: Caught exception OpenVRHost: Unable to retrieve server-side driver object due to OpenVR error 105 while initializing VR devices
Thank you in advance!
Dear Oliver,
I’m an amateur with Linux, IT and computer science in general, but managed to install SteamVR, Vrui 4.5-004 and the LidarViewer 2.13 on a Lenovo Cube with Linux Mint (Tara) and NVidia GeForce 1080 (390-48 driver). Vrui seems to be working, because the rotating earth appears. LidarViewer also works, because I managed to turn a .las file into a working .lidar. Also, I did a manual install, following the Readme from the source both with Vrui and LidarViewer.
When I try configuring the Vive, RunViveTracker.sh displays the following:
grep: symbol lookup error: grep: undefined symbol: pcre_jit_stack_alloc
then I tried the DeviceTest as described in your article, which displayed this:
Caught exception Comm::TCPPipe::TCPPipe: Unable to connect to host localhost on port 8555 while initializing VR device client
Could you help me with fixing this?
Should I just abandon trying to fix this setup and try older install combos?
Thank you!
ps. I’m a sculptor working usually with clay, axe and other simple electric machines. I am thinking of using this software as a B plan for an art project and since my time to finish it is getting shorter, even a simple comment as abandon all hope helps me a lot 🙂
Please try two things:
First, run in a terminal:
/usr/local/bin/VRDeviceDaemon -rootSection Viveand see if that works. It should print a bunch of stuff, and finally sit there after printing “VRDeviceServer: Listening for incoming connections on TCP port 8555”. It might print a lot of “ioctl (GFEATURE): Broken pipe” messages; simply ignore those.
Either way, if you don’t get a terminal prompt back it means it’s working and you can try DeviceTest.
If the above doesn’t work, try a small edit to /usr/local/bin/RunViveTracker.sh. Open it in an editor, like
sudo xed /usr/local/bin/RunViveTracker.shand look towards the end of the file. Comment out the last line (which includes fgrep), and remove the comment mark in front of the other line that runs VRDeviceDaemon. Then save and try running RunViveTracker.sh again.
Ahoj, thank you for replying!
so I did
/usr/local/bin/VRDeviceDaemon -rootSection Vive
which resulted in this error message, which I later could fix by installing the libSDL2-2.0.so.0
VRDeviceDaemon: Reading configuration file
VRDeviceDaemon: Initializing device manager
VRDeviceManager: Loading device Vive of type OpenVRHost
OpenVRHost: Loading OpenVR driver module from /home/kopacz/.steam/steam/steamapps/common/SteamVR/drivers/lighthouse/bin/linux64/driver_lighthouse.so
VRDeviceDaemon: Caught exception OpenVRHost: Unable to load OpenVR driver dynamic shared object /home/kopacz/.steam/steam/steamapps/common/SteamVR/drivers/lighthouse/bin/linux64/driver_lighthouse.so due to error libSDL2-2.0.so.0: cannot open shared object file: No such file or directory while initializing VR devices
after I have installed the libSDL, the same error appeared for the libudev.so.0 library. I installed this version of libudev as well, then the following error appeared when running VRDeviceDaemon with settings unchanged in RunViveTracker.sh
kopacz@kundi:~$ /usr/local/bin/VRDeviceDaemon -rootSection Vive
VRDeviceDaemon: Reading configuration file
VRDeviceDaemon: Initializing device manager
VRDeviceManager: Loading device Vive of type OpenVRHost
OpenVRHost: Loading OpenVR driver module from /home/kopacz/.steam/steam/steamapps/common/SteamVR/drivers/lighthouse/bin/linux64/driver_lighthouse.so
OpenVRHost: OpenVR driver module configuration directory is /home/kopacz/.steam/steam/config/lighthouse
VRDeviceManager: Managing 3 trackers, 14 buttons, 6 valuators
VRDeviceManager: Managing 3 virtual devices
VRDeviceManager: Initializing 1 device driver modules
OpenVRHost: Starting event processing
OpenVRHost: Initializing OpenVR driver module
OpenVRHost: Error: Requested server interface IVRPaths_001 not found
OpenVRHost: LoadSharedResource called with resource name {lighthouse}/firmware/manifest.vrfirmware and buffer size 0
OpenVRHost: LoadSharedResource called with resource name {lighthouse}/firmware/manifest.vrfirmware and buffer size 7877
OpenVRHost: LoadSharedResource called with resource name {htc}/firmware/manifest.vrfirmware and buffer size 0
OpenVRHost: LoadSharedResource called with resource name {htc}/firmware/manifest.vrfirmware and buffer size 808
OpenVRHost: Error: Requested server interface IVRIOBuffer_001 not found
ioctl (GFEATURE): Broken pipe #(repeated many times)
OpenVRHost: Activating newly-added head-mounted display with serial number LHR-22729228
OpenVRHost: Error: Requested server interface IVRDriverInput_002 not found
Segmentation fault (core dumped)
After commenting in and out the RunViveTracker.sh as you said and then running the RunViveTracker.sh, this appeared:
kopacz@kundi:~$ /usr/local/bin/RunViveTracker.sh
VRDeviceDaemon: Reading configuration file
VRDeviceDaemon: Initializing device manager
VRDeviceManager: Loading device Vive of type OpenVRHost
OpenVRHost: Loading OpenVR driver module from /home/kopacz/.steam/steam/steamapps/common/SteamVR/drivers/lighthouse/bin/linux64/driver_lighthouse.so
OpenVRHost: OpenVR driver module configuration directory is /home/kopacz/.steam/steam/config/lighthouse
VRDeviceManager: Managing 3 trackers, 14 buttons, 6 valuators
VRDeviceManager: Managing 3 virtual devices
VRDeviceManager: Initializing 1 device driver modules
OpenVRHost: Starting event processing
OpenVRHost: Initializing OpenVR driver module
OpenVRHost: Error: Requested server interface IVRPaths_001 not found
OpenVRHost: LoadSharedResource called with resource name {lighthouse}/firmware/manifest.vrfirmware and buffer size 0
OpenVRHost: LoadSharedResource called with resource name {lighthouse}/firmware/manifest.vrfirmware and buffer size 7877
OpenVRHost: LoadSharedResource called with resource name {htc}/firmware/manifest.vrfirmware and buffer size 0
OpenVRHost: LoadSharedResource called with resource name {htc}/firmware/manifest.vrfirmware and buffer size 808
OpenVRHost: Error: Requested server interface IVRIOBuffer_001 not found
ioctl (GFEATURE): Broken pipe #(repeated many times)
OpenVRHost: Activating newly-added head-mounted display with serial number LHR-22729228
OpenVRHost: Error: Requested server interface IVRDriverInput_002 not found
/usr/local/bin/RunViveTracker.sh: line 38: 6606 Segmentation fault (core dumped) $VRUIBINDIR/VRDeviceDaemon -rootSection Vive
If I change the RunViveTracker.sh back to its original version, running the tracker results in the original error message:
kopacz@kundi:~$ /usr/local/bin/RunViveTracker.sh
grep: symbol lookup error: grep: undefined symbol: pcre_jit_stack_alloc
running DeviceTest after RunViveTracker results in the same error:
Caught exception Comm::TCPPipe::TCPPipe: Unable to connect to host localhost on port 8555 while initializing VR device client
I found your issue. It was another change in OpenVR’s internal driver interface (as indicated by “OpenVRHost: Error: Requested server interface IVRDriverInput_002 not found”). I updated my OpenVR interface to the new ABI, but it might take me a bit to roll out a new version of Vrui.
If you’re interested, I can send you the changed source files and you can re-build Vrui. It should work at that point.
That would be nice!
my address is: kundhund at gmail
Thank you very much!
Pingback: Set-up Instructions for Vrui with HTC Vive Head-mounted Display | Doc-Ok.org
can you please send these (or a link and instructions to upgrade Vrui) to me as well? I am very close to completing the 3d computer at TERC and am missing this last piece (I do not feel exactly comfortable downgrading SteamVR drivers and would prefer to upgrade Vrui). joel@tahoetechgroup.com
I have the most recent version of SteamVR installed currently.
I am desperately trying to run Vrui but incurring in the same error:
“IVRDriverInput_002 not found”
Is there a chance I can get the updates source files you’re talking about as well?
My address is gianluca.martini at icloud.com
Thanks!
Hi, thank you very much for the guide but I am having a problem with the “steam” given “order not found. What can I do?