Running Vrui-based applications in glorious VR on an HTC Vive head-mounted display requires some initial set-up before Vrui itself can be installed and configured. This step-by-step guide will build upon an already-installed Linux operating system with high-performance graphics card drivers, specifically upon the current (as of 12/17/2018) version 19, code-named “Tara,” of Linux Mint, one of the most popular and user-friendly Linux distributions. This guide picks up right where the previous one in this series, “An Illustrated Guide to Installing Linux Mint 19 (“Tara”),” left off.
If you did not follow that guide, this one assumes that you have a “VR ready” or “gaming” PC with a powerful Nvidia GeForce graphics card, an installation of the 64-bit version of Linux Mint 19 (“Tara”) with the MATE desktop environment, and the recommended proprietary Nvidia graphics card driver. And an HTC Vive VR headset, of course.
Graphics Card Driver Set-up
Using a Vive headset with Vrui requires a change to the Nvidia graphics card driver’s configuration. Nvidia’s driver scans connected display devices for known VR headsets, and hides detected headsets from the desktop environment. This does make sense, as headsets are not standard monitors, and it would be awkward if windows or dialogs were to show up on a headset’s display. That said, here’s one relatively large quibble: headset filtering should happen earlier during the boot sequence, not just when the graphics card driver is loaded. As it is, headsets are still enumerated during boot, meaning that boot screens, BIOS menus, boot menus, etc. often show up on the headset, causing real problems. Anyway, carrying on.
Unfortunately for Vrui, there is currently no way to activate a hidden headset from inside an OpenGL-based VR application. For the time being, this means headset filtering in the driver needs to be disabled. To do so, open a terminal window (click on the terminal icon in the panel along the bottom screen edge, or right-click anywhere on the desktop and select “Open in Terminal” from the pop-up menu), enter exactly the following command into it (also see Figure 1) and press the Enter key (the $ sign indicates the terminal’s input prompt; don’t type it):
$ sudo xed /usr/share/X11/xorg.conf.d/50-Vive.conf
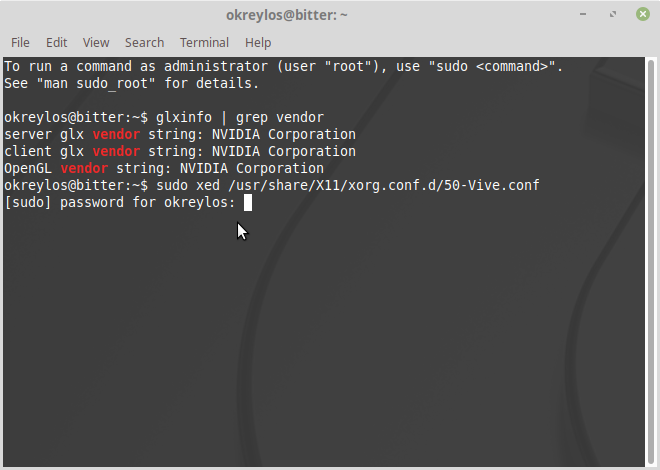
Figure 1: Creating a configuration file fragment using the xed text editor.
The terminal window will then ask you for your password, as “sudo” (“do as superuser”) requests an administrator-level operation. Enter your password — which will not be displayed back to you, so type carefully — and press the Enter key to confirm. This will open a text editor window with a blank page. Into that blank page, enter exactly the following text, see Figure 2:
Section "Device"
    Identifier "Device0"
    Option "AllowHMD" "true"
EndSection
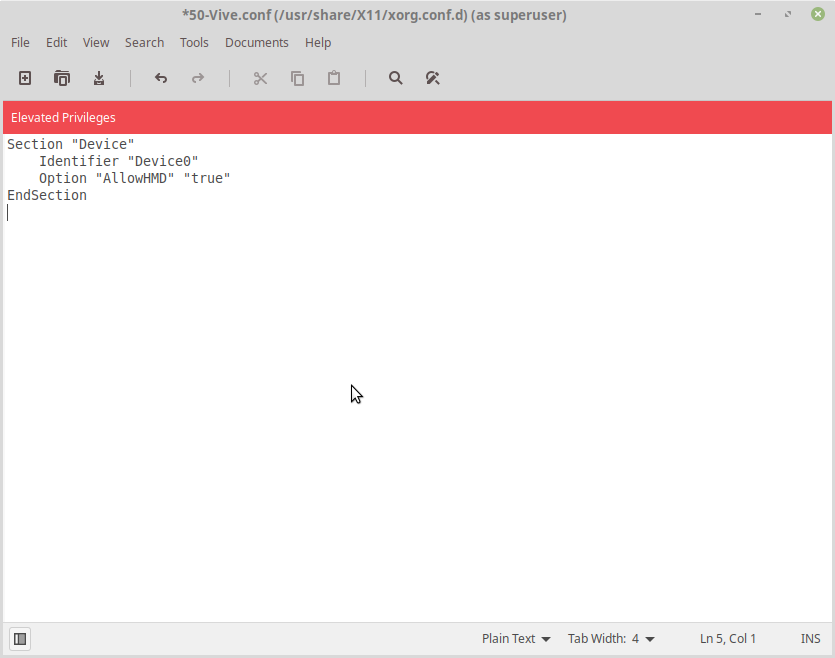
Figure 2: Creating a configuration file fragment using the xed text editor.
This file will be read by the Nvidia driver, and instruct it to disable headset filtering. As a result, connected VR headsets will show up as regular displays, and will be able to be used by Vrui applications. To activate this change, re-start the graphics driver by logging out from the desktop, and logging back in.
Connecting the Vive VR Headset
After logging back in, it is time to connect the Vive headset by plugging its HDMI video cable into one of the HDMI ports on the back of your graphics card. Depending on your graphics card model and the phases of the moon, your main display might turn momentarily black at the moment you plug in the headset’s cable, and the desktop panel along the bottom edge of the screen might disappear (that’s exactly the reason why headset filtering was added in the first place). Worry not, we will fix that next.
First, let’s check if the Vive headset was detected by the graphics card driver, and was shown to the desktop environment instead of being hidden. Open a terminal window, enter exactly the following command, and press the Enter key:
$ xrandr
The reply printed to the terminal window will look similar to Figure 3:

Figure 3: Checking for a connected Vive headset using xrandr.
xrandr is a program that displays detailed information about all non-hidden display devices connected to the computer, and lets users control those displays. We will be using that later. Until then, as is often the case, xrandr displays too much detail, so we will be using the grep program to cut the chaff (note that there is a space between the opening quote and the word “connected” in the following command):
$ xrandr | grep " connected"
The terminal will reply with something like the following (also see Figure 4):
HDMI-0 connected primary 2160x1200+2560+0 (normal left inverted right
x axis y axis) 122mm x 68mm
DP-1 connected 2560x1440+0+0 (normal left inverted right x axis y
axis) 597mm x 336mm
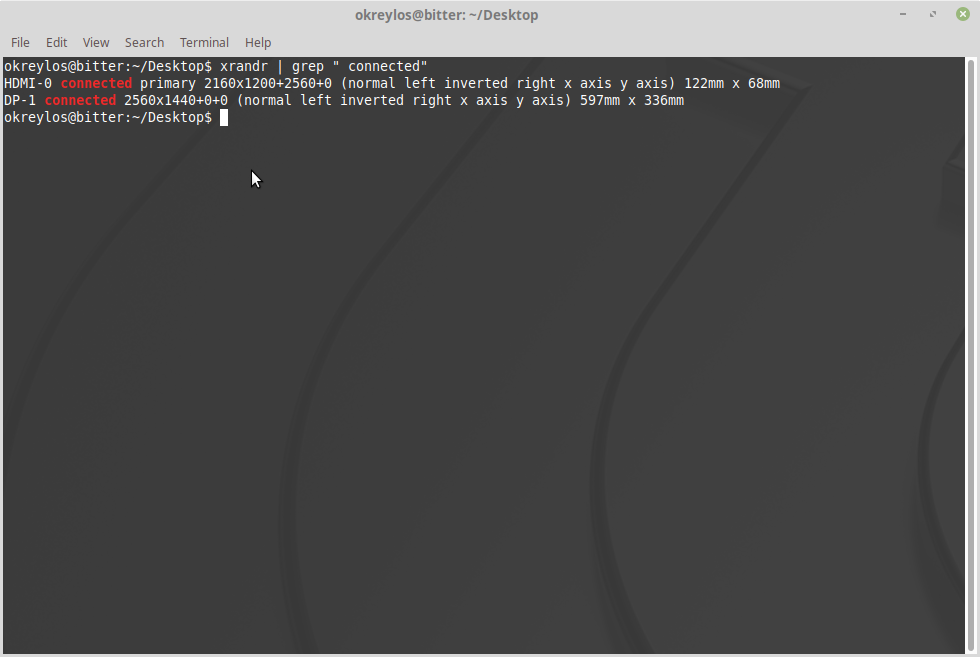
Figure 4: Getting to the meat of xrandr output with grep.
We can tell from the above output that there are two connected display devices. The first is plugged into the first HDMI port and has 2160×1200 pixels (this is the Vive headset), and the second one is plugged into the second DisplayPort port, and has 2560×1440 pixels (this is my main display). This is good news; it means the Vive was detected, and not hidden by the graphics card driver. The “primary” tag in the Vive’s line indicates that, in my case and for whatever reason, the desktop manager chose the Vive as the main display, meaning my desktop panel moved over to it and disappeared from the main display.
Your xrandr output will probably be different from mine. Identify your main display and your Vive headset (the Vive will show with a size of 2160×1200 pixels, and a refresh rate of 89.53 Hz in the un-grepped xrandr output, see Figure 3), and note down their outputs, in my case DP-1 and HDMI-0 for the main display and the Vive, respectively.
We will now use xrandr to properly configure the set of displays. Into the terminal window, enter the following (replacing DP-1 and HDMI-0 with the outputs previously reported by your xrandr) and press the Enter key (also see Figure 5):
$ xrandr --output DP-1 --auto --primary --output HDMI-0 --auto --right-of DP-1
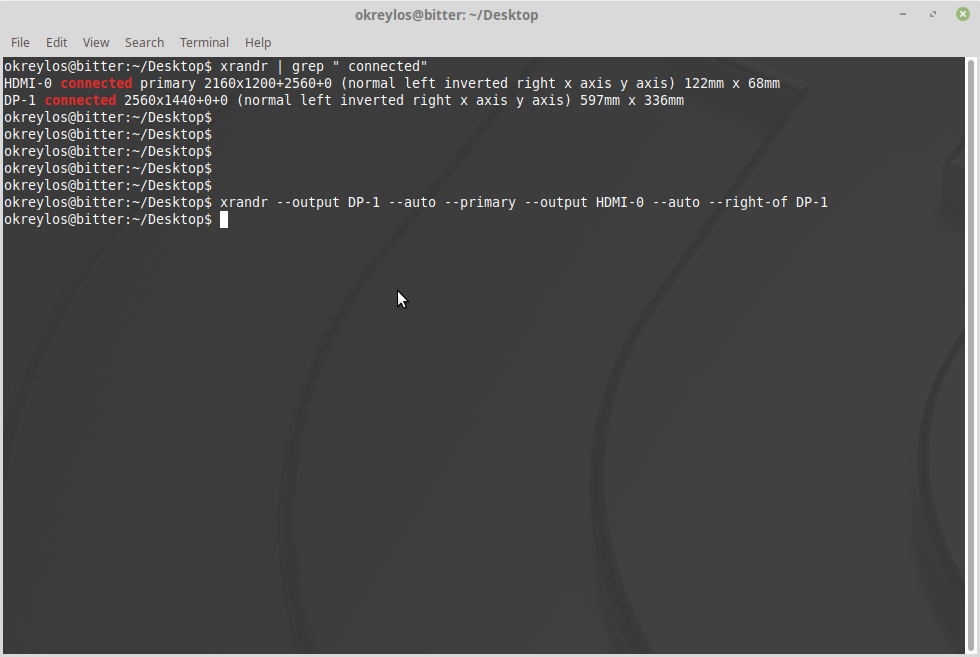
Figure 5: Configuring displays using xrandr.
This command tells xrandr to enable the display connected to the second DisplayPort port (–output DP-1 –auto) and make it the primary display (–primary), to enable the display connected to the first HDMI port (–output HDMI-0 –auto) and place it to the right of the display on DP-1 (–right-of DP-1). Of course, replace DP-1 and HDMI-0 with the output ports reported by your xrandr.
This rather long command will be very useful in the future, as it will turn on the Vive’s display and place it properly next to the main display. To make it simpler to invoke this command, we will create a script file. Into the terminal, enter the following sequence of four commands, confirming each with the Enter key (also see Figure 6):
$ cd
$ mkdir bin
$ cd bin
$ xed ViveOn
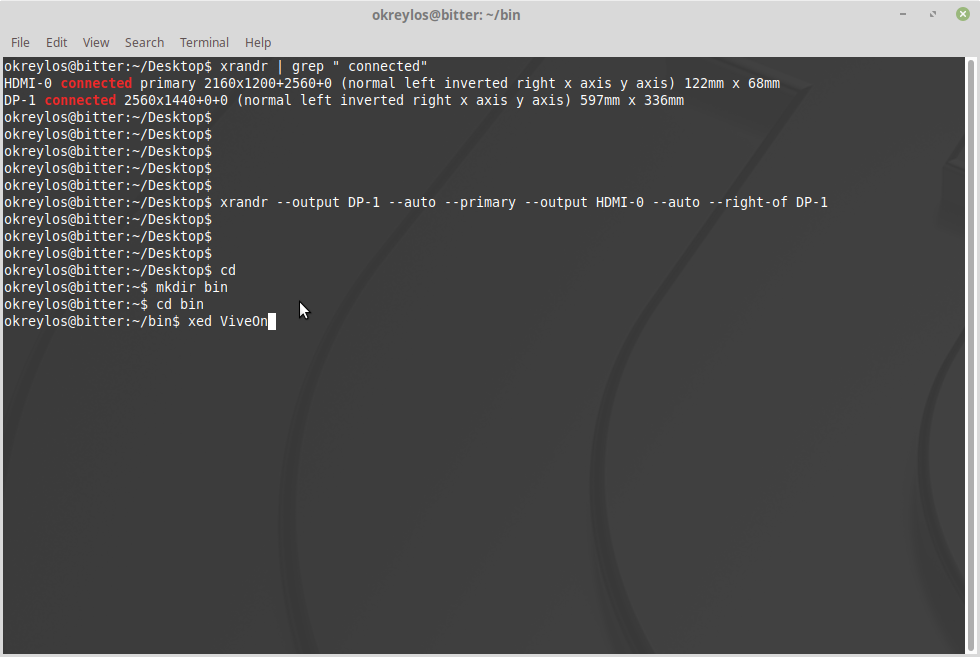
Figure 6: Creating a “bin” directory for scripts and creating a “ViveOn” script.
These commands will change into your home directory (cd, “change directory”), create a new directory called “bin” under your home directory (mkdir, “make directory”), change into that new directory (cd bin), and open a blank text editor window for a new file called “ViveOn.” Into that text editor window, enter the following text (also see Figure 7):
#!/bin/bash

# Turn on the Vive's display and place it to the right of the main display:
xrandr --output DP-1 --auto --primary --output HDMI-0 --auto --right-of DP-1
As above, replace DP-1 and HDMI-0 with the correct connectors for your system.

Figure 7: Creating a script with the xed text editor.
Once done, save the file and close the text editor window. Then enter exactly the following into the terminal window (also see Figure 8):
$ chmod a+x ViveOn
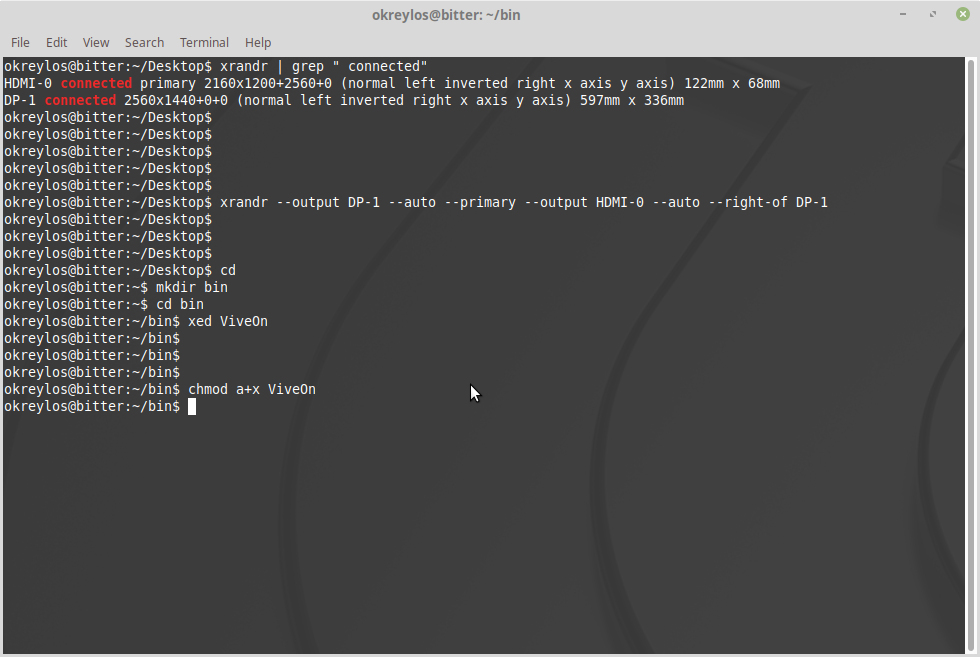
Figure 8: Marking the “ViveOn” script as executable.
The chmod (“change mode”) command tells the terminal that the ViveOn file is a program that can be executed (+x) by any user (a).
Next, we create a companion script that turns the Vive’s display off again, by copying the ViveOn script and making changes with the text editor (also see Figure 9):
$ cp ViveOn ViveOff
$ xed ViveOff
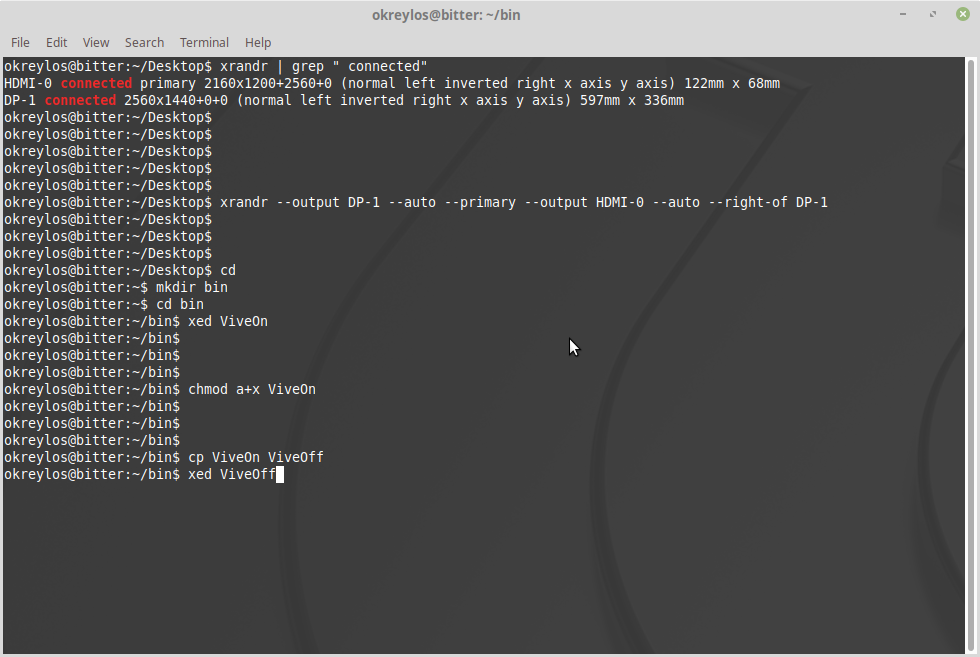
Figure 9: Creating a companion “ViveOff” script.
The first command (cp, “copy”) copies the “ViveOn” script to “ViveOff” to use as a starting point, with the executable flag already set. Inside the text editor, change the script’s contents to the following, again replacing output names as appropriate (also see Figure 10):
#!/bin/bash

# Turn off the Vive's display:
xrandr --output DP-1 --auto --primary --output HDMI-0 --off
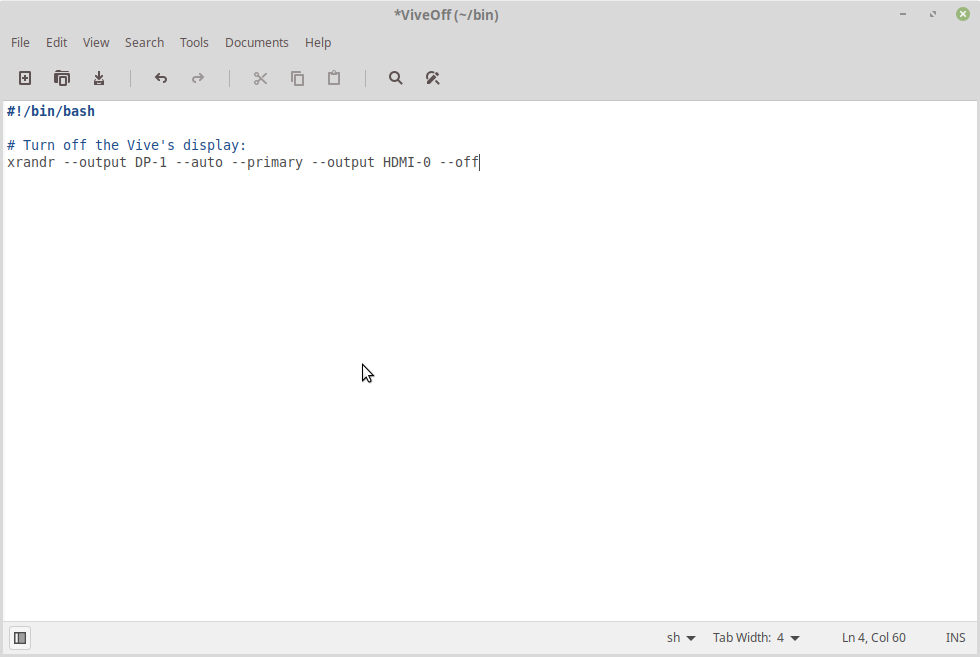
Figure 10: Editing the “ViveOff” script.
Next, we need to tell the terminal to look for commands inside the new “bin” directory that we created. The terminal used by Linux Mint is run by a command interpreter called “bash” (“Bourne-again shell,” programmers like their puns) controlled through a configuration file called “.bashrc” (“bash resources”) inside the user’s home directory. We will edit that file by entering the following command into a terminal (see Figure 11):
$ xed ~/.bashrc
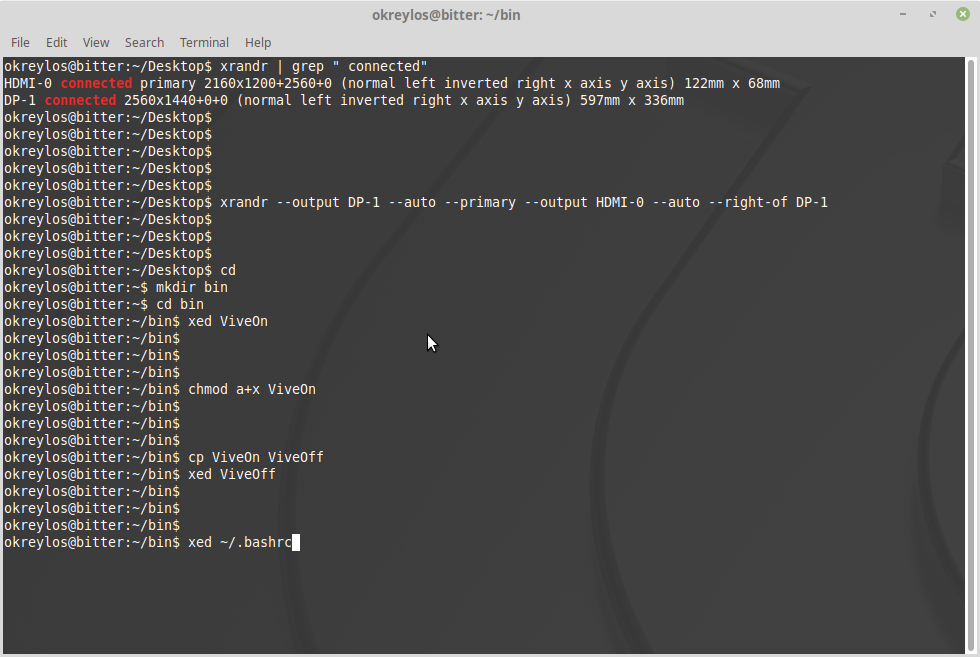
Figure 11: Opening the bash terminal configuration file with the xed text editor.
The tilde (“~”) at the beginning of the file name is a shortcut for the current user’s home director. This command will open the existing .bashrc file in a text editor. The file is already quite long; scroll to the very bottom of it, and append the following two lines, see Figure 12:
# Set up executable search paths:
export PATH=$HOME/bin:$PATH
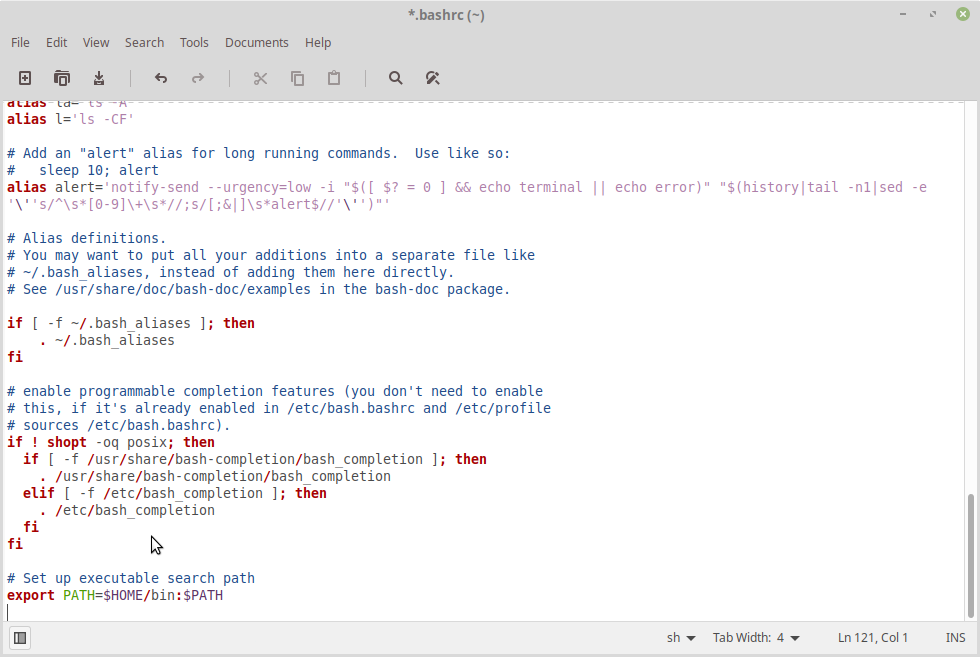
Figure 12: Appending the user’s bin directory to the terminal’s executable search path.
When looking for executable commands, bash searches a colon-separated list of directories stored in the PATH variable. The line we added takes the directory containing our new scripts, $HOME/bin (HOME is a variable containing the current user’s home directory, and the dollar sign instructs bash to replace the name of that variable with its value), and puts it in front of the already-existing directory list, $PATH, with a colon in-between. As a result, bash will be looking for executables in our bin directory first, before looking in the usual places.
After saving the .bashrc file and closing the text editor, opening a new terminal window and simply typing “ViveOn” followed by the Enter key will turn on the Vive’s display, and typing “ViveOff” followed by the Enter key will turn it off again. That’s already convenient, but we can make it even easier by creating two desktop icons, to turn the Vive’s display on and off, respectively.
Click the right mouse button anywhere on the desktop, and select “Create Launcher…” from the pop-up menu, see Figure 13.
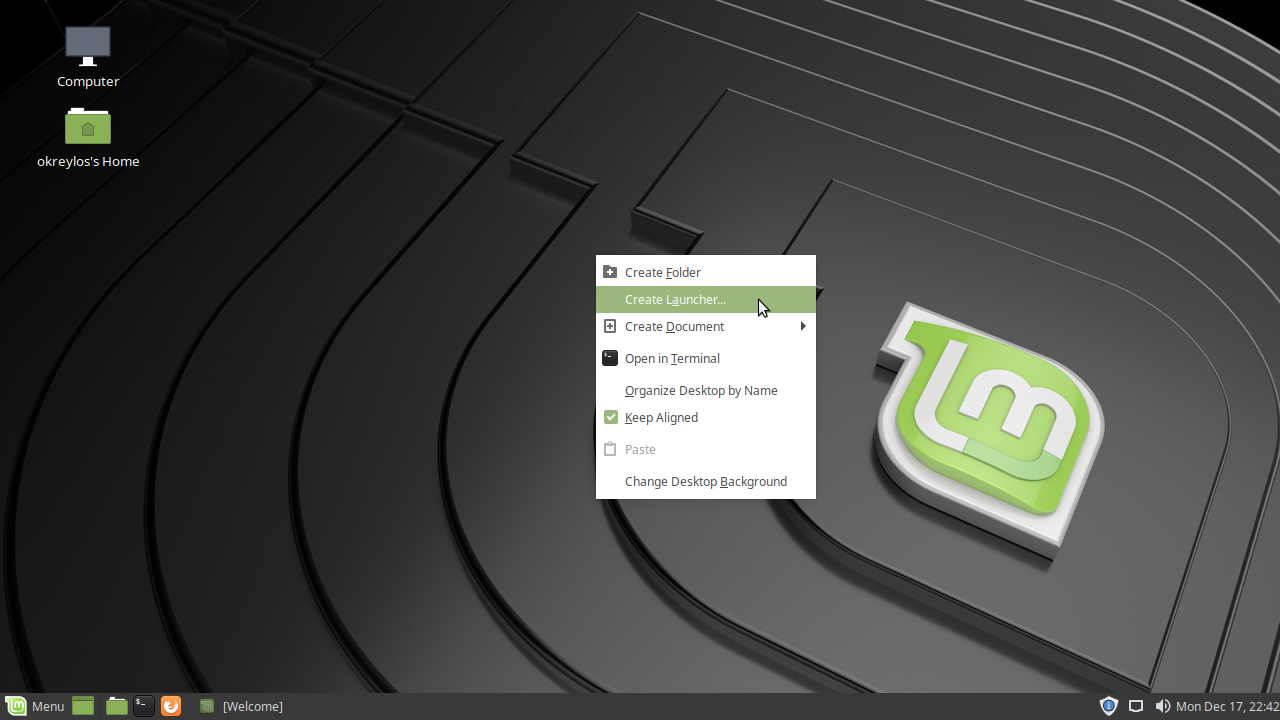
Figure 13: Creating a new launcher through the desktop’s context menu.
This will open the “Create Launcher” dialog, see Figure 14. Fill in the name of the new launcher and a usage hint as shown in Figure 14, and then click the “Browse” button to select which executable to launch when the launcher is double-clicked. You could also enter the name directly into the “Command:” text field; it would be /home/<your user name>/bin/ViveOn.

Figure 14: The “Create Launcher” dialog, with name and comment filled in.
Clicking the “Browse” button instead will open an application chooser dialog, see Figure 15. In that dialog, first click on the “Home” icon in the left column, and then double-click on the “bin” directory in the right column.
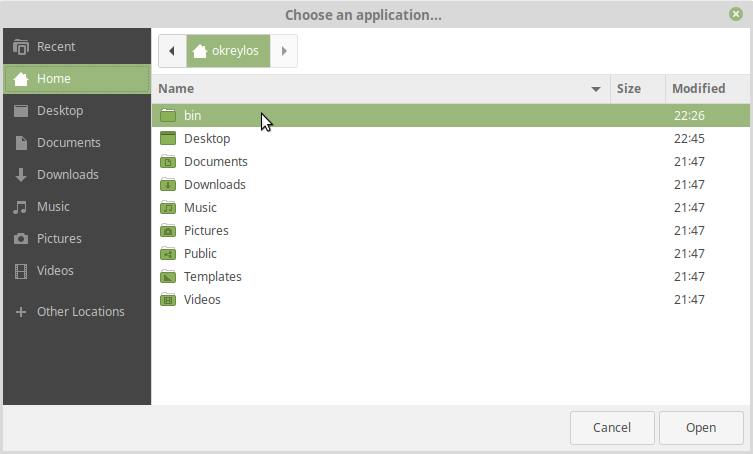
Figure 15: Navigating to the user’s “bin” directory.
That will open the directory and show the only two files in there, ViveOn and ViveOff, see Figure 16. Double-click on “ViveOn” (or select “ViveOn” and click the “Open” button) to copy the script’s full name into the “Create Launcher” dialog’s “Command” field, see Figure 17.
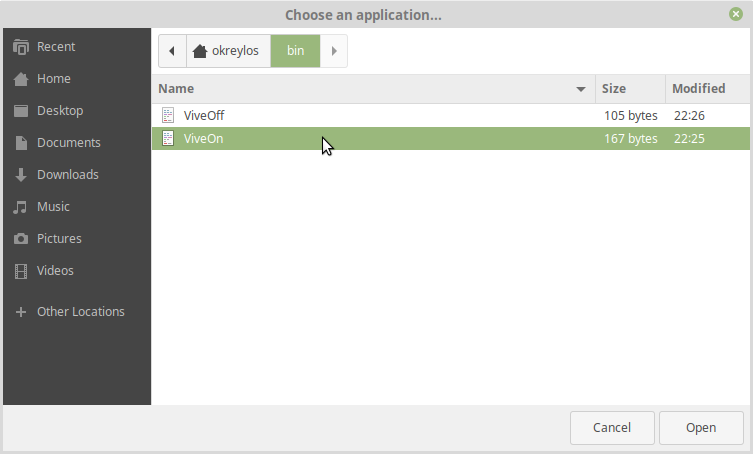
Figure 16: Selecting the “ViveOn” script.
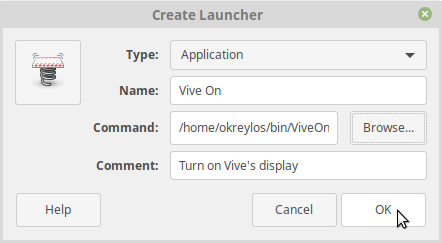
Figure 17: The “Create Launcher” dialog, with the “Command” field filled in.
To finish creating the launcher, click the “OK” button. This will create a new icon labelled “Vive On” on the desktop. Double-clicking that icon will turn on the Vive’s display.
Next, repeat the same steps to create a launcher to turn off the Vive’s display, using the ViveOff script. The result should be two new icons in total, see Figure 18.
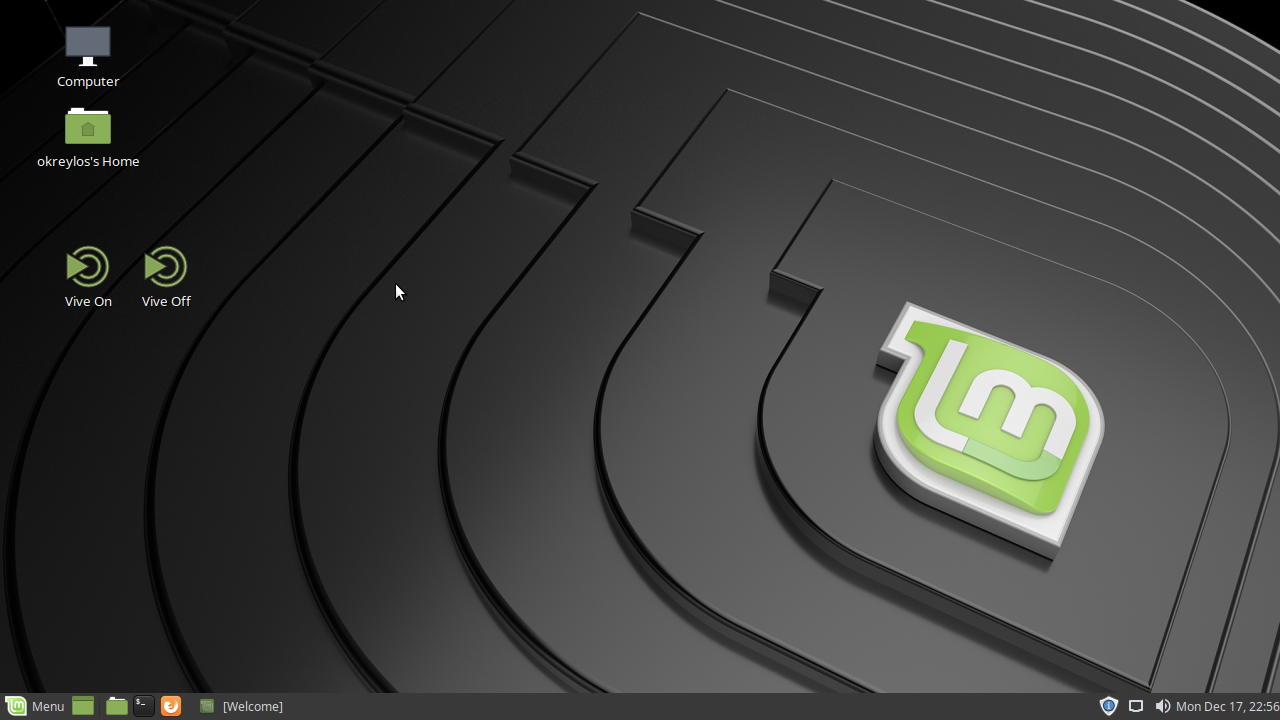
Figure 18: A set of new icons to control the Vive’s display on the desktop.
Do not worry if the icons look different on your desktop; it does not matter. This completes the first set-up step, configuring the graphics card driver and creating convenient ways to control the Vive’s display.
Disabling the Vive’s Display on Start-up
This is an optional step that might make life a little easier going forward. As it stands now, if your Vive is connected to the computer at the time you boot it up or log into the desktop, its display will turn on, and your desktop might get messed up as a result. You might even have to double-click the “Vive Off” icon first thing every time you log in.
Fortunately, there’s a fix for that. You can instruct the graphics card driver to leave the Vive’s display off until explicitly told to turn it on, say by the “Vive On” icon. For this, you need to know the output ports to which your main display and the Vive are connected, as in the previous steps. In my case, and going forward as examples, those ports are DP-1 and HDMI-0 for the main display and the Vive, respectively.
We need to edit the graphics card driver’s configuration file again, as earlier when we disabled headset filtering. In a terminal, run:
$ sudo xed /usr/share/X11/xorg.conf.d/50-Vive.conf
Then re-enter your password if asked, and insert the following text into the “Device” section, underneath the line “Option “AllowHMD” “true”.” As usual, replace DP-1 and HDMI-0 with the output ports used on your system:
Option "ConnectedMonitors" "DP-1, HDMI-0"
Option "nvidiaXineramaInfoOrder" "DP-1, HDMI-0"
Option "UseDisplayDevice" "DP-1"
The first line tells the driver to bypass its device discovery stage and assume that your main display and the Vive are connected to your computer. The second line tells it to treat your main display as the primary display, i.e., the one that shows the login dialog and the desktop panel. The third line is the important one: it tells the driver to only use your main display, and leave the Vive disabled, by default. After you made the changes, save the file and quit the text editor. The next time you log out and back in or restart your computer, only your main display will be used. If you turn on your Vive’s display with the “Vive On” icon and log out, it will turn off again automatically.
Installing Steam and SteamVR
The Vive head-mounted display requires low-level driver software to operate. This software, called “SteamVR,” is distributed through the “Steam” content delivery system (an app store for, mostly, PC games). While both Steam and SteamVR can be downloaded and installed at no cost, it takes quite a few steps to do so (see Figures 19-37). It would be much more convenient if one could bypass Steam and directly download only those (small) parts of SteamVR that are essential to operating a Vive. Alas, that would be a copyright violation; “free of charge” is not the same thing as “free” after all.
The first step is installing Steam itself. In Linux Mint, this is easy as Steam is available through the Software Manager. To reach it, go back to the “Welcome” screen, select “First Steps” in the left column, scroll down in the right column, and click the “Launch” button underneath the “Software Manager” heading, see Figure 19.
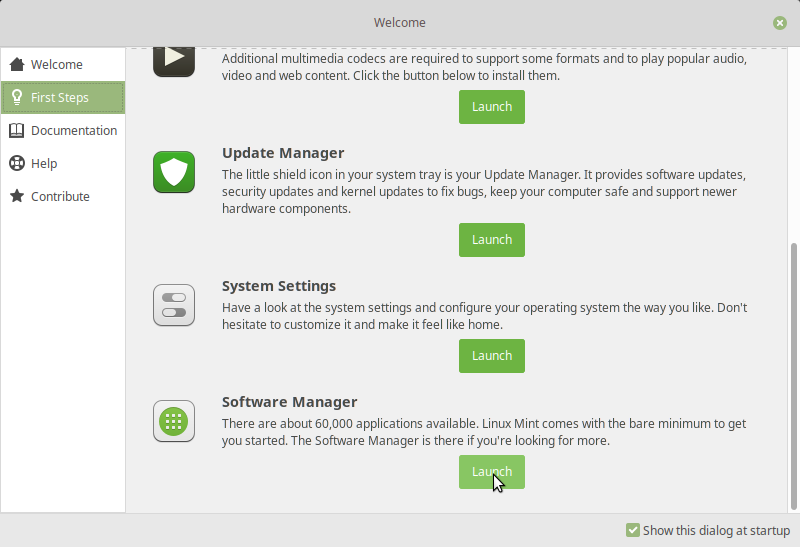
Figure 19: Launching the Software Manager from the “Welcome” screen.
When the Software Manager starts, Steam might already be prominently featured on the “Editor’s Picks” panel, see Figure 20. If it is not, click on the search field in the top-right corner, see Figure 20, and enter “Steam,” see Figure 21.
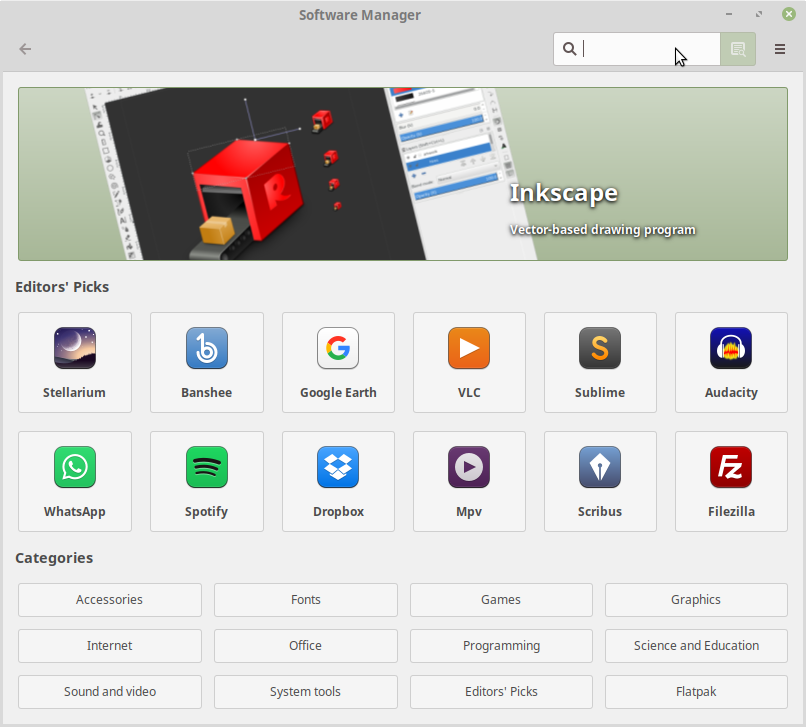
Figure 20: The Software Manager. The search field is in the top-right corner.
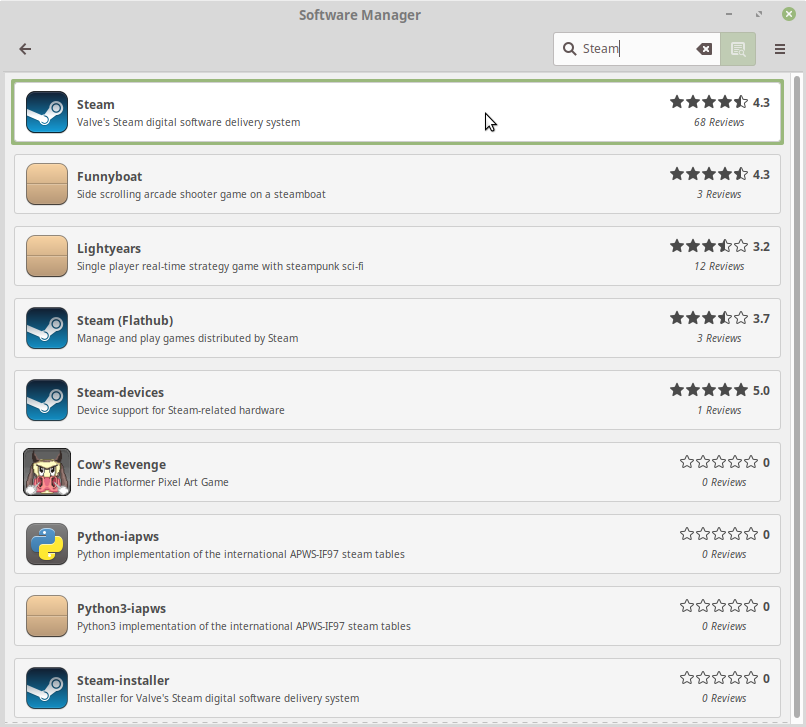
Figure 21: The Software Manager showing a list of applications matching the keyword “Steam.” The actual “Steam” application should be the first in the list.
The correct application (its description should read “Valve’s Steam digital software delivery system”) should then appear at the top of the list. Click on it to get to Steam’s detail page, and click the “Install” button, see Figure 22.
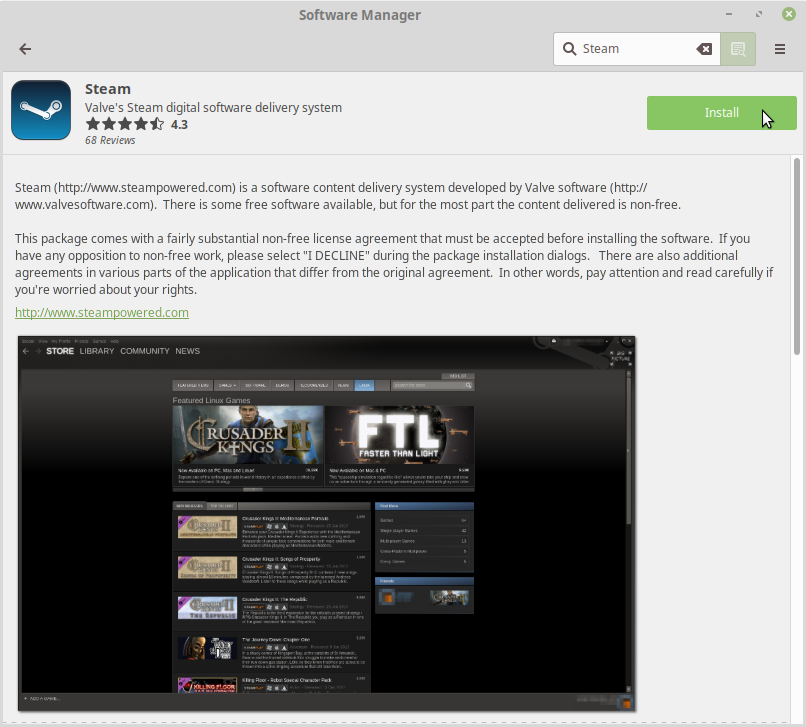
Figure 22: Steam’s detail page.
Clicking “Install” will show a sequence of confirmation dialogs. The first will alert you that Steam requires additional changes, see Figure 23. Click the “Continue” button to see an authentication dialog where you will have to enter your password and click the “Authenticate” button, see Figure 24.
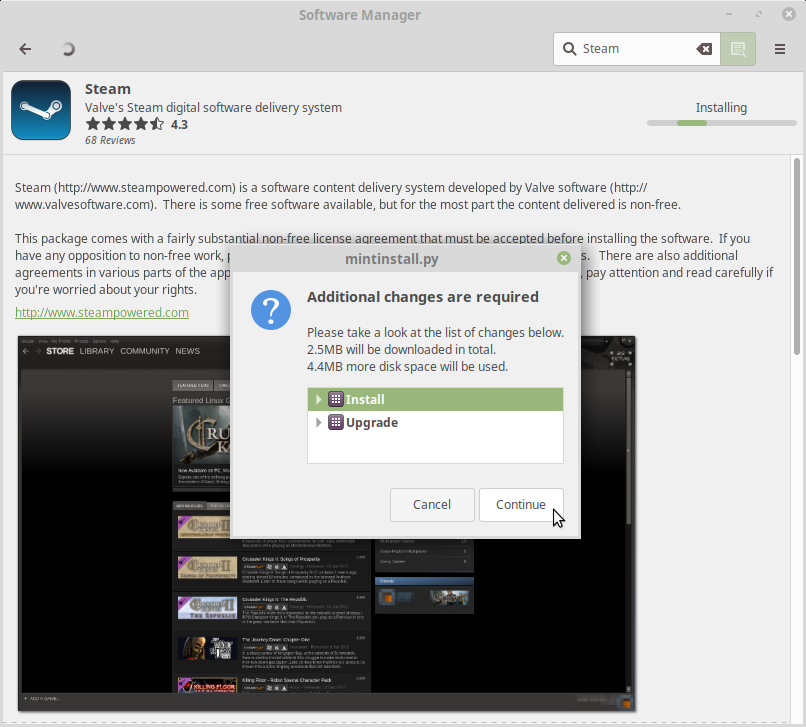
Figure 23: Confirming additional changes to the system.
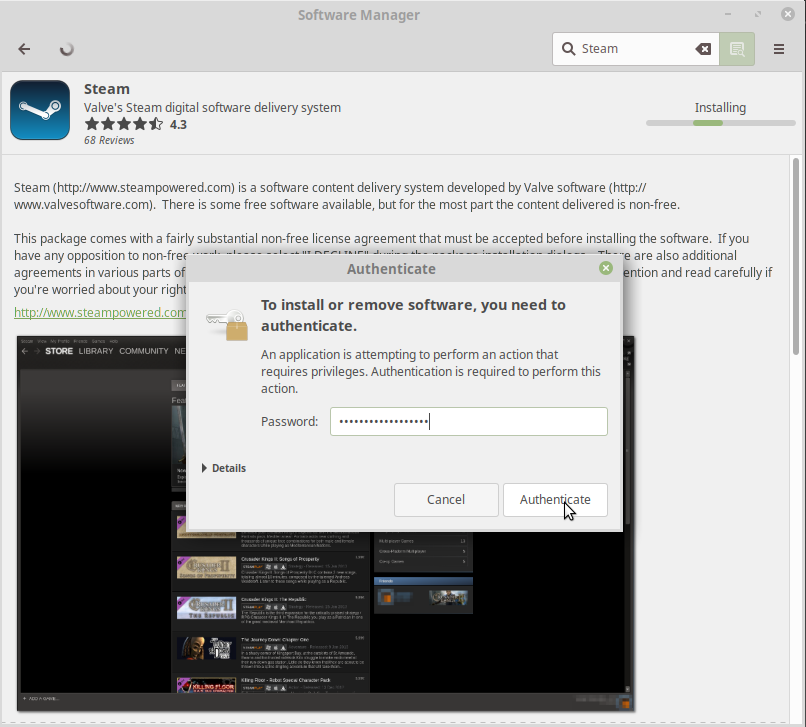
Figure 24: Enter your password to authorize system-level changes.
After that the Software Manager will download Steam and install it, and then replace the “Install” button on Steam’s detail page with a pair of “Launch” and “Remove” buttons, see Figure 25. Click the “Launch” button to launch Steam — which will not actually launch Steam, but a second-stage installer, see Figure 26. Just wait for however long it takes to download and install the actual application.
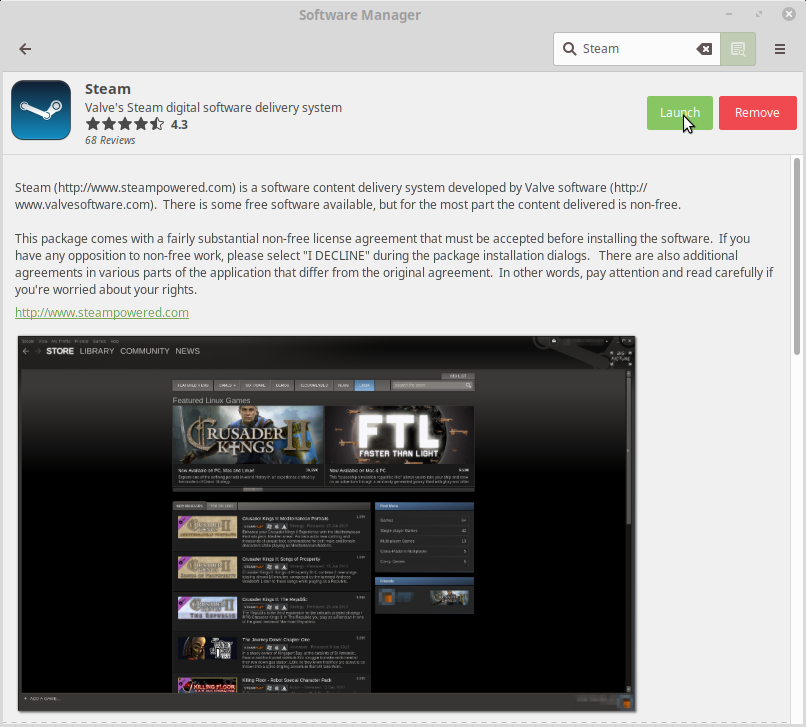
Figure 25: After installation, click the “Launch” button to start Steam’s second-stage installer.

Figure 26: Steam’s second-stage installer downloading the actual application.
When the second-stage installer is finished, it will show a “welcome” dialog, see Figure 27. Steam requires a user account before one can download any software, even free-of-charge software. If you already have a Steam account, click on “Login to an Existing Account” and enter your account name and password into the login dialog that pops up, see Figure 29, and continue from there. If you do not have a Steam account yet, click on “Create New Account” to create one, which is also free of charge.
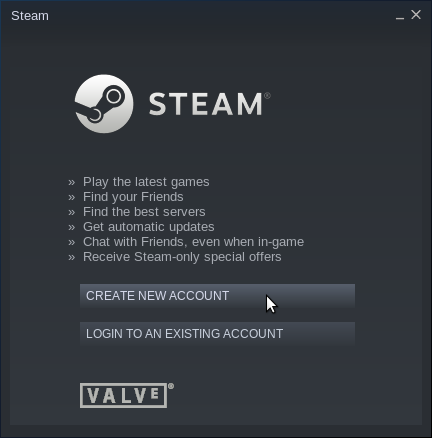
Figure 27: Steam’s log-in page.
To create an account, you need a valid email address, need to consent to Steam’s Subscriber Agreement and confirm that you are at least 13 years old, and pass a CAPTCHA challenge, see Figure 28. You must use a real working email address at this point, as Steam will send a confirmation email to that address before it will let you pass. Some of Steam’s CAPTCHAs are very tough; click the “Refresh” button if you can’t parse the one presented to you. There does not seem to be an upper limit on the number of challenges you can attempt. After you have filled in all the fields, click the “Continue” button.
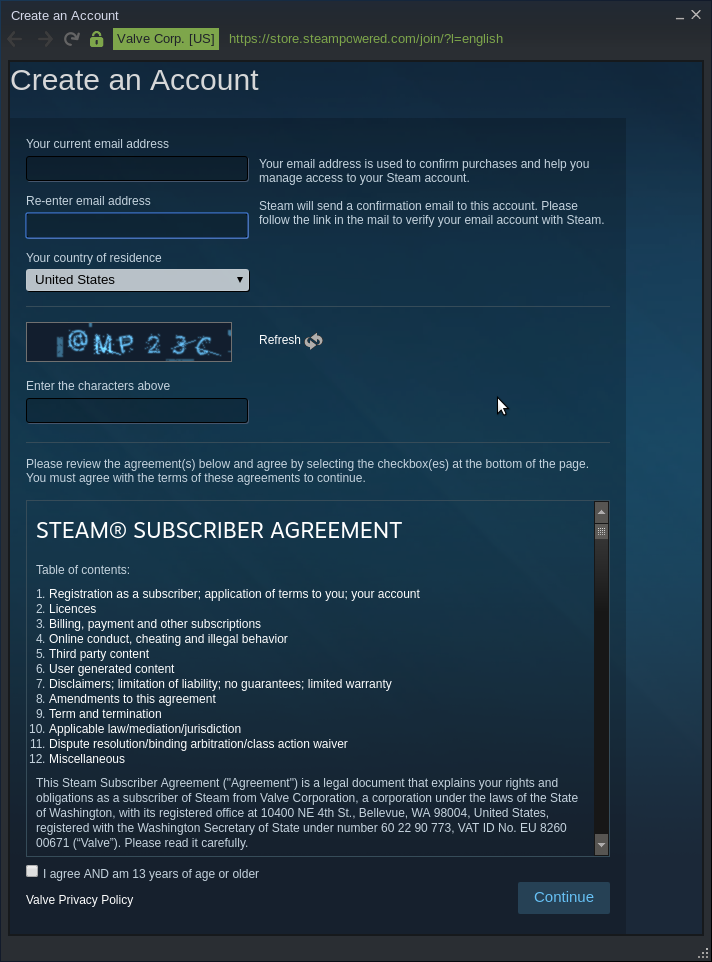
Figure 28: The dialog to sign up for a no-cost Steam account. You must use a real email address here.
After you press the “Continue” button, and your entered values pass Steam’s check, the Steam servers will send an email to the address you entered. You need to click on the link in that email to activate your account, which will move you past the account creation dialog and back to the “Steam Login” window, see Figure 29, where you can enter the name and password you assigned to your new account. Click the “Login” button when you have entered your credentials. You could also check the “Remember my password” field so you do not have to re-enter those every time you start Steam, but, as it turns out, you do not have to start Steam ever again if all you want to do is use the Vive with Vrui applications — it is, in fact, better to never start Steam again, as it might automatically update itself and break compatibility with Vrui.
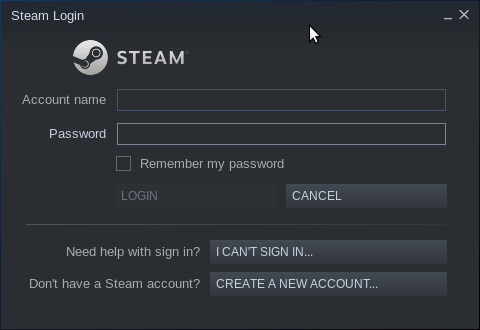
Figure 29: Log in to your (new) Steam account here with your Steam user name and password.
The next step, after logging into Steam for the first time, is to download and install the SteamVR application. If you plugged in your Vive headset prior to starting Steam, Steam might detect it and helpfully show you a button to install SteamVR right on the front page, see Figure 30. If it does not, click on the “Games” button in the main “Library” tab, and select “Tools” from the menu that pops up, see Figure 31.

Figure 30: Steam offering to install SteamVR right at the start, if it detected an already-plugged in Vive headset.
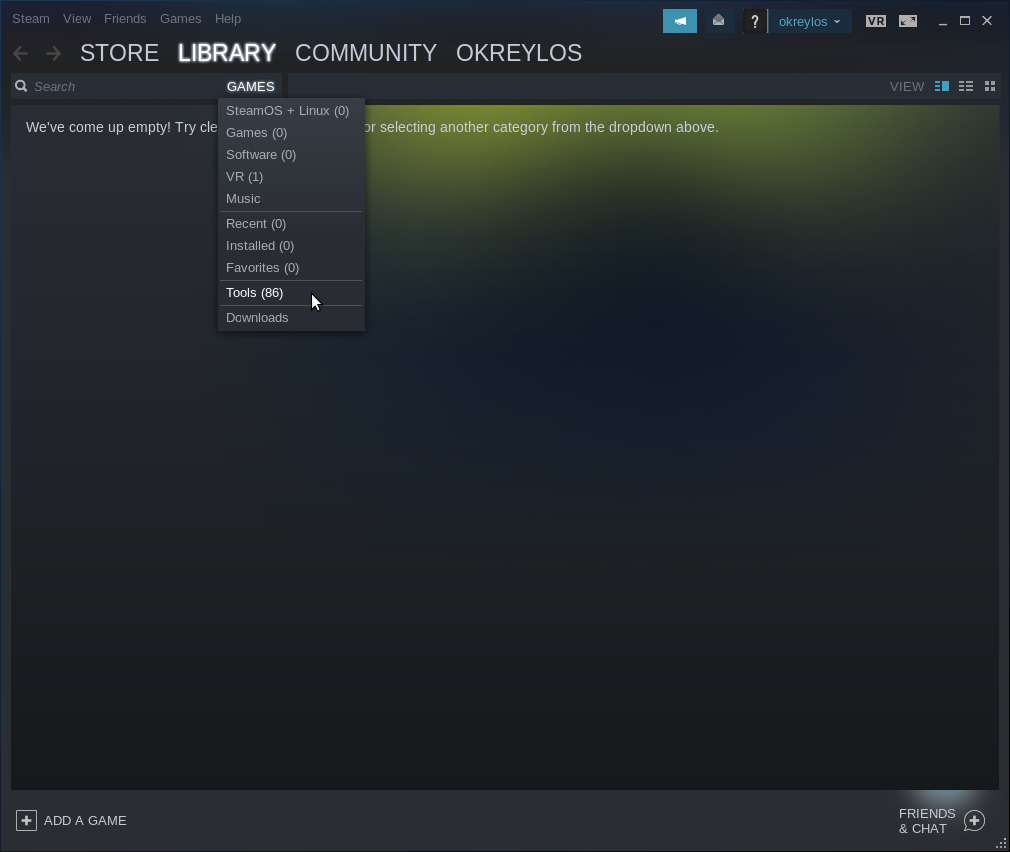
Figure 31: Manually installing SteamVR through the “Tools” sub-menu.
After selecting “Tools,” scroll down in the list until you find “SteamVR”, right-click on its entry, and select “Install Game…” from the menu that pops up, see Figure 32.
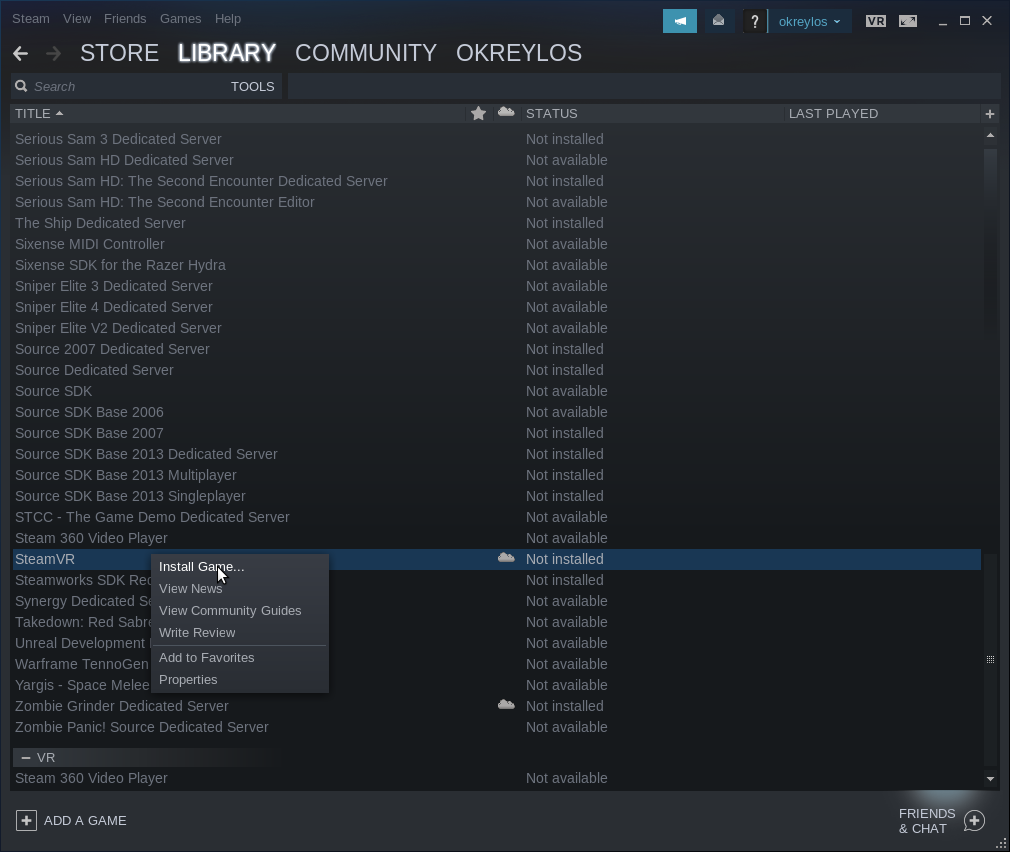
Figure 32: Installing SteamVR from the list of tools.
In the next two dialogs, confirm that you have enough disk space to install SteamVR, see Figure 33, then click the “Next” button, and finally click the “Finish” button in the confirmation dialog that shows up next, see Figure 34.
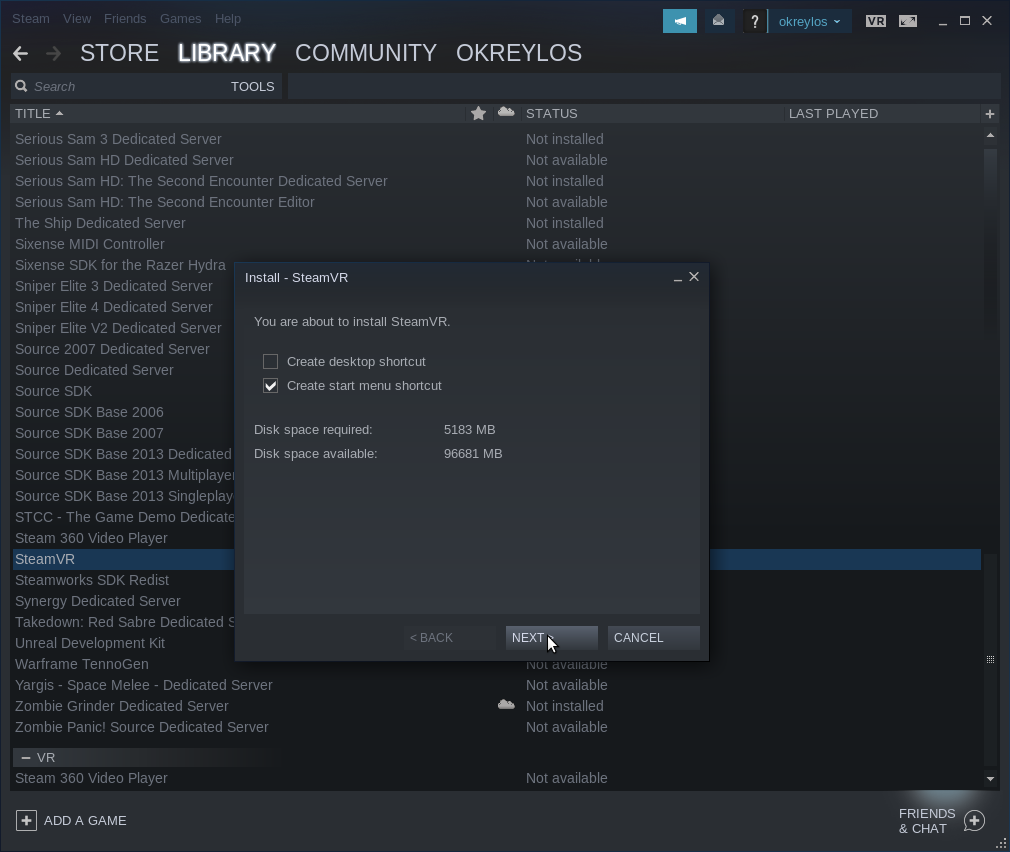
Figure 33: Checking available disk space.
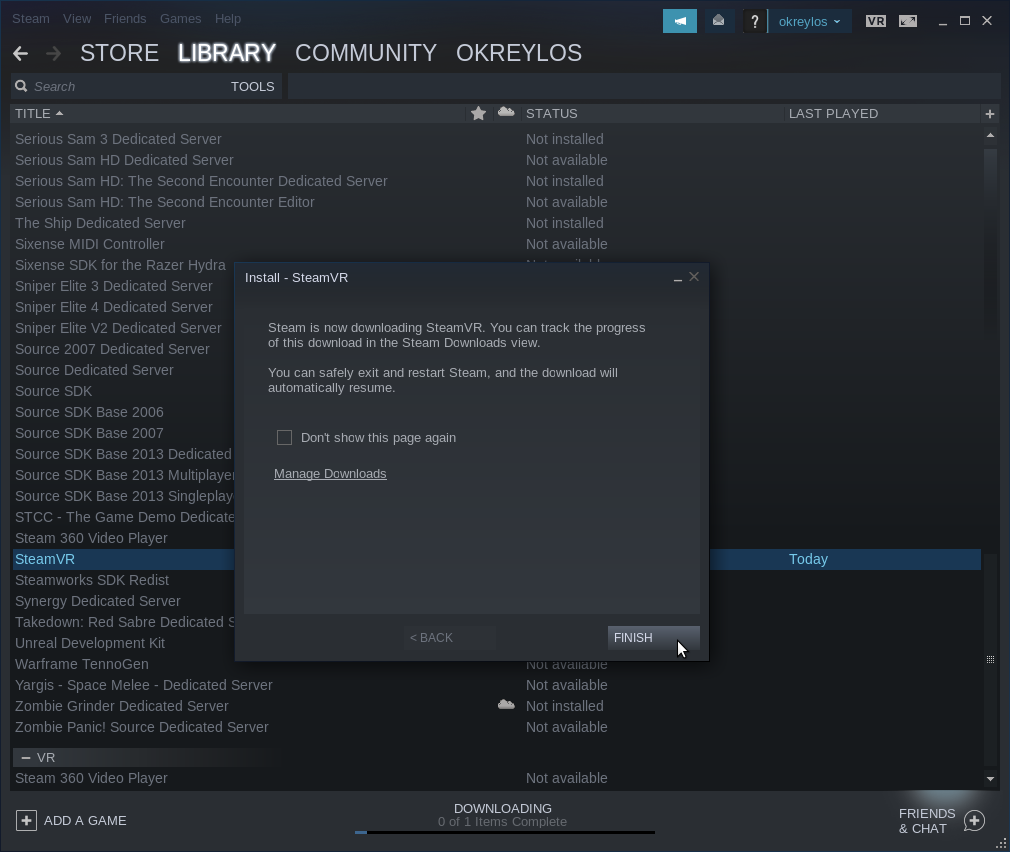
Figure 34: Confirming SteamVR installation.
After clicking the “Finish” button, Steam will show the progress of downloading SteamVR in its tools list entry, and also in the “Downloading” section at the bottom of Steam’s main window, see Figure 35. By clicking on the “Downloading” section, you can switch to the “Downloads” page, where you can track SteamVR’s installation progress in more detail, see Figure 36.
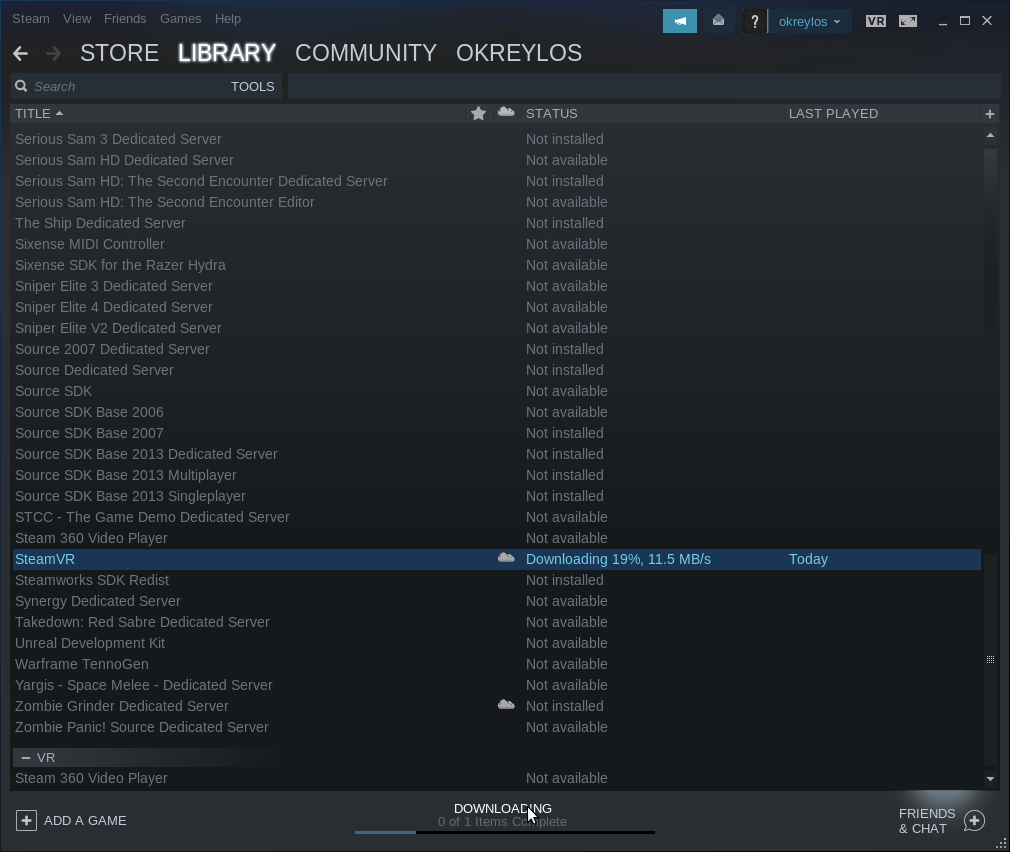
Figure 35: Tracking SteamVR installation in the “Tools” list.
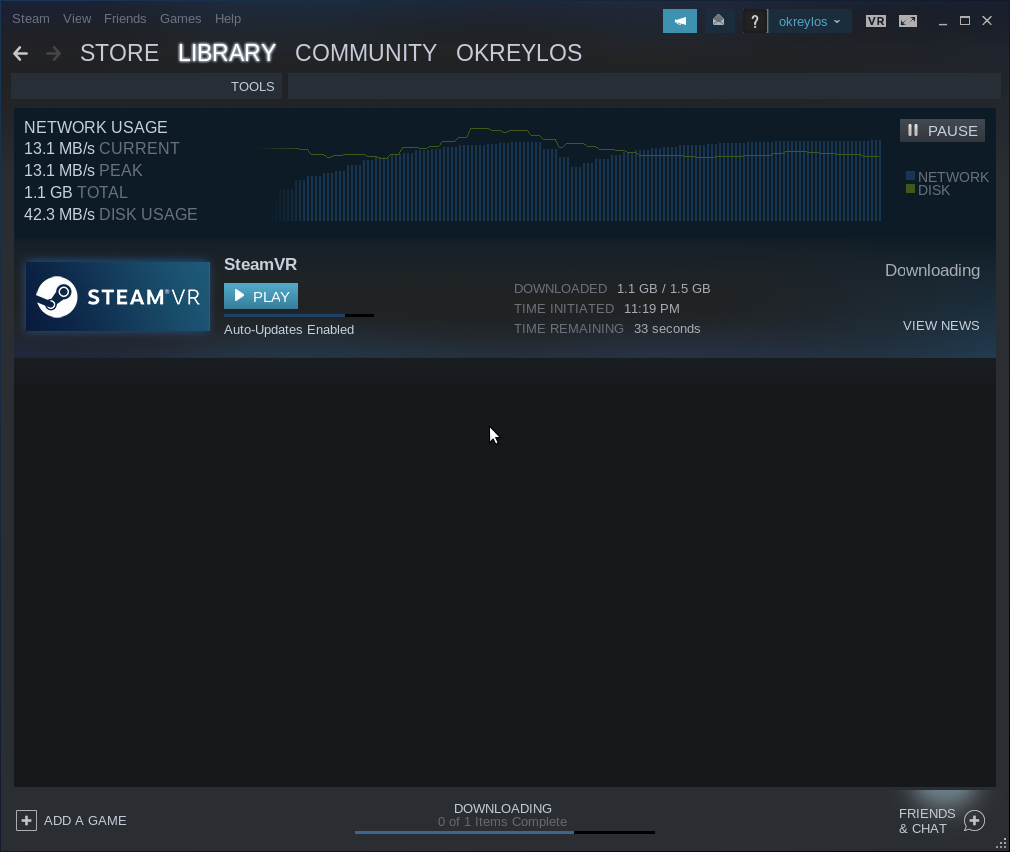
Figure 36: Tracking SteamVR installation on the “Downloads” page.
When installation of SteamVR is complete, the Downloads page will change SteamVR’s status from “Downloading” to “Ready to Play,” see Figure 37. There is no need to actually start SteamVR. At this point, it is best to exit from Steam by selecting “Exit” from the “Steam” menu in the top-left corner, see Figure 37.
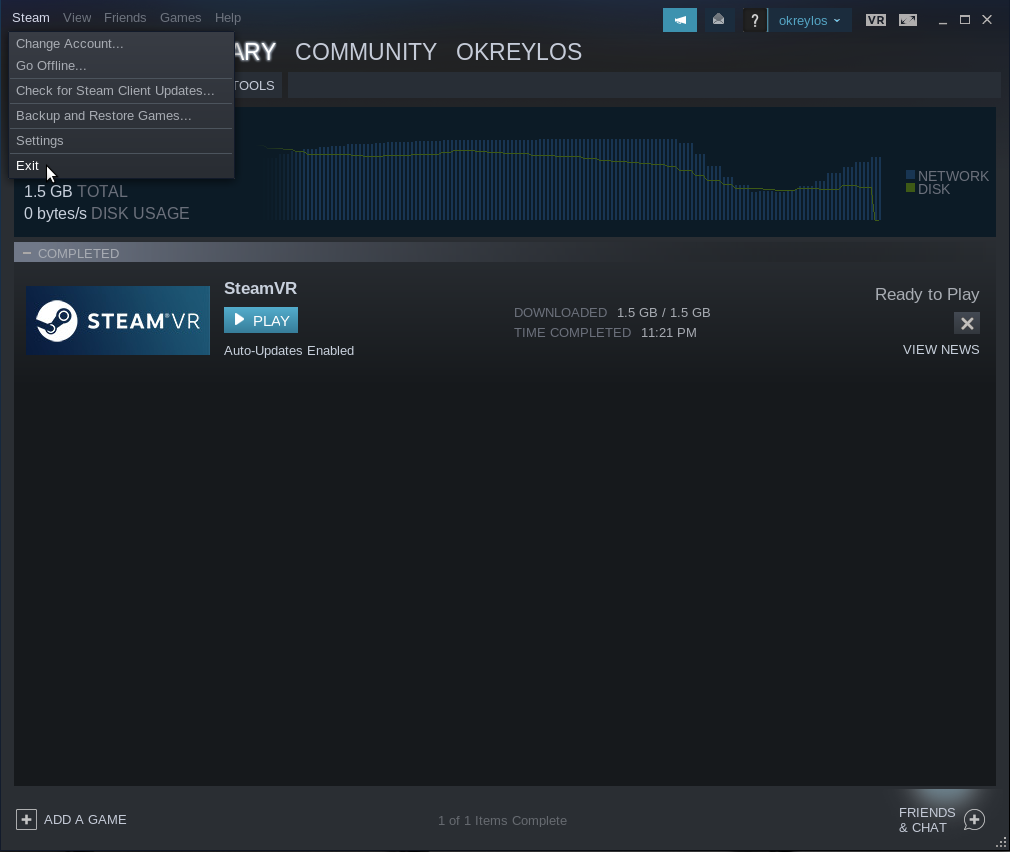
Figure 37: Steam is done downloading and installing SteamVR. That’s it, as far as Steam is concerned.
Neither SteamVR nor Steam need to be active to run Vrui-based VR applications. As long as SteamVR is installed, everything will work fine. To prevent automatic updates of SteamVR from breaking Vrui compatibility, we strongly recommend never to start Steam again, unless that is required by a future Vrui software update.
Success!
At this point, your Vive VR headset is fully operational and ready to be used with Vrui VR applications. Please see the next guide in this series on how to download, install, and configure the Vrui VR development toolkit and its applications.

Pingback: Set-up Instructions for Vrui with HTC Vive Head-mounted Display | Doc-Ok.org