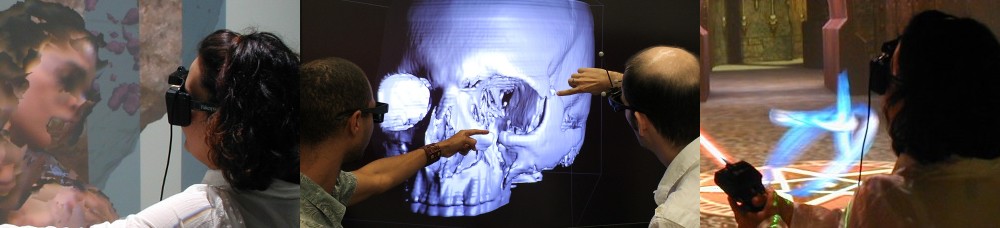
“Virtual Worlds Using Head-mounted Displays” is the most complex video I’ve made so far, and I figured I should explain how it was done (maybe as a response to people who might say I “cheated”).
The basics
The video is a mix of four sources: a main video track showing the virtual world (a Doom3 level rendered by my own reverse-engineered viewer with some portal stuff thrown in), a secondary video track showing me in the real world (to illustrate how real-world actions get translated into virtual-world interactions), the audio track, and a 3D video track captured from a single Kinect camera to embed my body into the virtual world.
The easy bits first: I recorded the secondary video track using a tripod-mounted Canon Vixia digital video camera with an added wide-angle lens. The 3D video stream from the Kinect camera was written to a pair of compressed files using my Kinect driver package. The main video track and the audio track, on the other hand, were recorded internally to the VR software using Vrui’s built-in recording facilities. These recording facilities work more like a MIDI sequencer than an audio recorder: they do not capture frames of what’s displayed on a VR environment’s screens (in this case, on the HMD screens), but they capture all 6-DOF tracking and event data and ancillary data (such as time stamps) that went into creating the images on the screens. These recordings can then be played back in a second run of the application, at which time video frames can be captured. The “raw” recording procedures produced the following:
- An xxxx.mts file containing video from the camera in AVCHD format at 1440×1080 pixel resolution (16:9 aspect ratio) at 29.97 Hz, directly copied from the camera’s internal flash memory.
- A pair of Kinect-<serial number>.color and Kinect-<serial number>.depth files, containing compressed 3D video from the Kinect camera.
- An InputDeviceData.dat file, containing tracking, event, and ancillary data required to play back a Vrui session.
- A SoundData.wav audio file containing the audio track recorded from a USB headset (16 bit, mono, 16kHz sample rate), already synchronized to the InputDeviceData.dat file by Vrui’s recording facilities.
There are several reasons to use this two-step approach. For one, saving video frames at 30 fps (or 29.97 fps here, to match the video camera’s recording rate) has a significant performance impact, and leads to momentary “hiccups” whenever the operating system deems it necessary to flush its disk write cache. In other words, it would not have been possible to create smooth video by directly dumping frames. But the secondary reason is even more important: saving input device and ancillary data means that playback becomes malleable. Just like a MIDI recording can be played back using a different tempo, pitch, or instrument, a Vrui recording can be played back in a different environment, or using different settings (as long as one is careful, that is).
Concretely, I decided to use a wide-angle screen during playback. The real HMD I used for the video has a 47° field of view (and paired left/right views), which is annoyingly narrow in real life, but even worse when watching a video. To get around that, I set up a virtual screen with a >90° field of view for playback (incidentally approximating the field of view of an Oculus Rift HMD). Meaning the final video shows a lot more of the virtual world than I was actually seeing while filming it. I don’t consider that cheating, because narrowness of field-of-view and its impacts was not a topic in the video. In a sense, the wide-FOV view in the video is a more “true” representation of what I saw through the HMD. With those settings, the second playback step produced a set of video frames, Frame000000.ppm to Frame017690.ppm, each at 1280×720 pixel resolution, captured at a rate of exactly 29.97 Hz.
Synchronization
Three of the sources, the video frames created by playback, the Kinect 3D video stream, and the audio track, were already synchronized courtesy of Vrui (and the Kinect 3D video stream was already baked into the video frames by playback, anyway). To synchronize primary video and audio with the secondary video track, I used my left hand as a crude “clapper” — which I forgot to cut out, so it’s still visible at the beginning of the video :). I used the image sequence viewer packaged with Vrui’s example programs to find the index of the video frame corresponding to the “clap” in the main video track, and a video player to do the same for the secondary video track. This showed an offset of 167 frames between the two sources, which I corrected by deleting the first 167 video frames of the main video track, and cutting off the first 5.5722 s of the audio track using the audacity software.
The problem with this approach to synchronization is that it hides any latency in the display because it lines up events in the real and virtual video streams, no matter how far apart in time they actually happened. Unfortunately, I have no idea how else to do it. I don’t even know the exact end-to-end latency of the VR system I cobbled together here. I’m estimating it to be around 30ms, but that’s mostly a guess based on the sampling rate of the tracking system, the frame rate of the HMD, and the rate at which the application can render frames.
When using it, the system feels very “snappy.” I haven’t noticed any wobbliness from high-latency tracking, and I definitely have not gotten dizzy or motion sick or nauseated. But then, I have not yet used the system for long periods without breaks. The longest session was probably around 45 minutes, while I was hunting down a bug in the portal rendering code. After that I felt fine, minus some eye strain because the screens in the Z800 HMD are not exactly aligned vertically, and I haven’t corrected for that yet.
Video processing
Instead of using video editing software to merge all sources, I used the ffmpeg command line tool (because I’m old school like that, and because ffmpeg is awesome). First, I scaled and rotated (I filmed it in portrait mode) the secondary video source, and turned it from interlaced 59.96 Hz to into progressive 29.97 Hz:
ffmpeg -i xxxx.mts
       -vf "scale=320:180, transpose=2"
       -r 29.97
       -vcodec libx264 -threads 8 -b:v 4M
       -an
       Overlay.mov
Then I combined the main and secondary video tracks and the audio track into a single video file:
ffmpeg -i SoundData-Cut.wav
       -r 29.97 -i Frames/Frame%06d.ppm
       -vf "movie=Overlay.mov [small];
            [in][small] overlay=10:390 [out]"
       -vcodec libx264 -threads 8 -b:v 5M
       -acodec libmp3lame -b:a 64k
       -map 1:0 -map 0:0
       Combined.mov
Finally, I uploaded the Combined.mov video file to YouTube, and Tadaa!
I glossed over one little detail. Ffmpeg expects frame sequences to start with frame index 0, and I didn’t find a way to tell it otherwise. So when I deleted the first 167 frames of the frame sequence, I also had to rename all remaining frames to start at zero again. Here’s a bash command line to do just that:
for I in `seq 167 17690`;
  do J=`expr $I - 167`;
  mv `printf "Frames/Frame%06d.ppm" $I`
     `printf "Frames/Frame%06d.ppm" $J`;
  done
Secrets and glitches and dirty tricks, oh my!
How did I make it so I could temporarily disable positional head tracking? Via the dirtiest of hacks in the Vrui toolkit. I temporarily added the option to “lock” an input device, by remembering its position at the time of locking, and then only updating its orientation in response to device driver state updates until the time of unlocking. Nasty, nasty. I then added a temporary “event” tool to the Doom3 map viewer application that, when activated, locked or unlocked the head tracking device (hard-coded, of course), and pre-bound that tool to a button on the wand.
Why was the input device tracking so glitchy? I repurposed the InterSense IS-900 tracking system in my lab’s tiled display wall for this experiment. It has tracking rails mounted around the edges of the screen, pointing into the space in front of the screen. Normally, this results in rock solid tracking. However, I had to place the Kinect camera somewhere. I wanted a vantage point where it could see my hands and legs and feet from above, and my face (or what’s visible of it under the HMD) so I could see myself through a portal. That means I had to mount the Kinect high up and forward, so I put it on a ladder that I moved as close to the display wall as I felt comfortable. But this put the ladder right in front of the tracking rails, obstructing some of the ultrasound emitters and creating interference with some others. The bottom line is glitchy tracking if the IS-900 base station decides that the “best” emitters are the ones that are obstructed. Too bad.
How did I get the 3D video from the Kinect to exactly match Vrui’s notion of input device positions? Specifically, how did I get the 3D video image of the wand to match the grey cone indicating the tracked position and orientation of same? Not really a secret; just an application of extrinsic Kinect calibration. I placed the usual calibration target into the Kinect’s field of view at two positions, and measured the 3D grid corners of the target in both positions using the standard method. At the same time, I recorded the position of the same grid corners using Vrui’s built-in measurement tool by touching them with the wand. Then running the alignment procedure was all that was needed to create the calibration seen in the video. I was surprised myself by how well it turned out.
And one more glitch, and an embarrassing one that I didn’t notice until viewers started pointing it out (and they won’t stop pointing it out…). When recording audio, Vrui’s recording facility drains the audio source’s sample buffer before shutting down so that no audio from the end of the recording gets lost (that used to be a problem in early versions). Unfortunately, the pulseaudio sound daemon dynamically increases a sound recorder’s buffer size when the recorder runs uninterrupted for long times to reduce system load. This resulted in an around 2 minute (!) long recording buffer at the end of the recording session, and while my code was waiting for the buffer to drain, pulseaudio was still happily putting samples into it. I didn’t terminate the application so that I would get a clean audio file, and I did not notice at all, neither during video processing nor during upload, that there were an extra ~2 minutes of dangling audio after the end of the video track. Which is why I can be heard cursing about the obvious bug towards the end. 🙂

Pingback: Astounding Oculus Rift demo with Kinect, a, positional tracking and an
cool stuff. Interesting and infiormative!
Pingback: Here’s what the immersive, 3D computer interface of the future will feel like – Quartz