Running Vrui-based applications in glorious VR on an HTC Vive head-mounted display requires some initial set-up before Vrui itself can be installed and configured. This step-by-step guide will build upon an already-installed Linux operating system with high-performance graphics card drivers, specifically upon the current (as of 12/17/2018) version 19, code-named “Tara,” of Linux Mint, one of the most popular and user-friendly Linux distributions. This guide picks up right where the previous one in this series, “An Illustrated Guide to Installing Linux Mint 19 (“Tara”),” left off.
If you did not follow that guide, this one assumes that you have a “VR ready” or “gaming” PC with a powerful Nvidia GeForce graphics card, an installation of the 64-bit version of Linux Mint 19 (“Tara”) with the MATE desktop environment, and the recommended proprietary Nvidia graphics card driver. And an HTC Vive VR headset, of course.
Graphics Card Driver Set-up
Using a Vive headset with Vrui requires a change to the Nvidia graphics card driver’s configuration. Nvidia’s driver scans connected display devices for known VR headsets, and hides detected headsets from the desktop environment. This does make sense, as headsets are not standard monitors, and it would be awkward if windows or dialogs were to show up on a headset’s display. That said, here’s one relatively large quibble: headset filtering should happen earlier during the boot sequence, not just when the graphics card driver is loaded. As it is, headsets are still enumerated during boot, meaning that boot screens, BIOS menus, boot menus, etc. often show up on the headset, causing real problems. Anyway, carrying on.
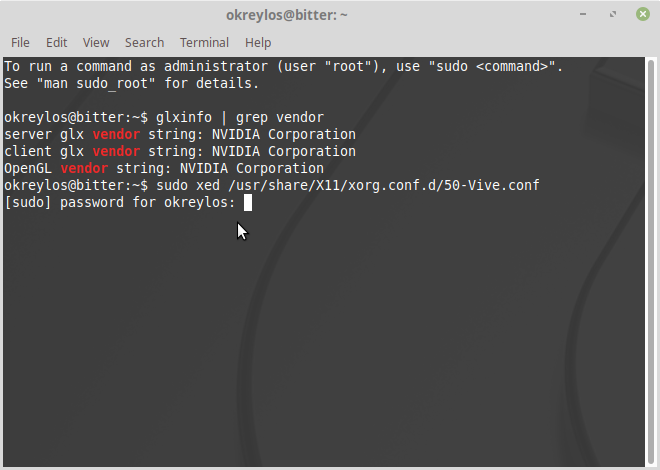
Unfortunately for Vrui, there is currently no way to activate a hidden headset from inside an OpenGL-based VR application. For the time being, this means headset filtering in the driver needs to be disabled. To do so, open a terminal window (click on the terminal icon in the panel along the bottom screen edge, or right-click anywhere on the desktop and select “Open in Terminal” from the pop-up menu), enter exactly the following command into it (also see Figure 1) and press the Enter key (the $ sign indicates the terminal’s input prompt; don’t type it):
$ sudo xed /usr/share/X11/xorg.conf.d/50-Vive.conf


