What I haven’t mentioned before is that we have an even lower-cost, and, more importantly, easier to install, alternative using just a 3D TV and a Razer Hydra gaming input device. These environments are not holographic because they don’t have head tracking, but they are still very usable for a large variety of 3D applications. We have several of these systems in production use, and demonstrated them to the public twice, in our booth at the 2011 and 2012 AGU fall meetings. What we found there is that the environments are very easy to use; random visitors walking into our booth and picking up the controllers were able to control fairly complex software in a matter of minutes.
A user controlling a low-cost 3D display (running the Nanotech Construction Kit) with a Razer Hydra 6-DOF tracked input device.
I’m on vacation in Mexico right now, and yesterday evening my brother-in-law took my wife and me to see “The Hobbit,” in 3D, in quite the fancy movie theater, with reclining seats and footrests and to-the-seat service and such.
I don’t want to talk about the movie per se, short of mentioning that I liked it, a lot, but about the 3D. Or the “stereo,” I should say, as I mentioned previously. My overall impression was that it was done very well. Obviously, the movie was shot in stereo (otherwise I’d have refused to see it that way), and obviously a lot of planning went into that aspect of it. There was also no apparent eye fatigue, or any other typical side effect of bad stereo, and considering how damn long the movie was, and that I was consciously looking for conversion problems or artifacts, that means someone was doing something right. As a technical note to cinemas: there was a dirty spot on the screen, a bit off to the side (looked as if someone had thrown a soda at the screen a while ago), and that either degraded the screen polarization, or was otherwise slightly visible in the image, and was a bit distracting. So, keep your stereo screens immaculately clean! Another very slightly annoying thing was due to the subtitles (the entire movie was shown in English with Spanish subtitles, and then there were the added subtitles when characters spoke Elvish or the Dark Tongue), and even though I didn’t read the subtitles, I still automatically looked at them whenever they popped up, and that was distracting because they were sticking out from the screen quite a bit.
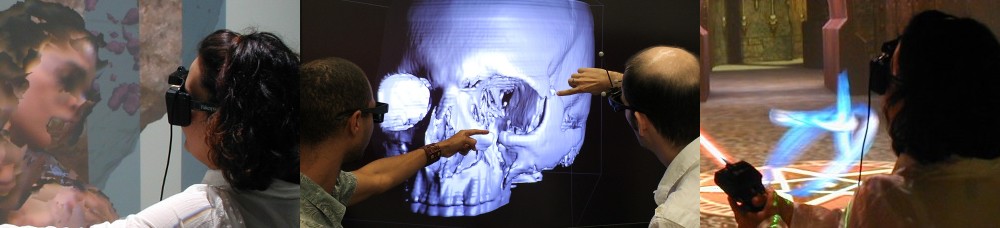
I’ve written at length (here, here, here, and here) about the challenges of properly supporting immersive displays such as CAVEs or HMDs such as the upcoming Oculus Rift, and the additional degrees of freedom introduced by 3D tracking.
I just found this interesting post by James Iliff, talking about the same general issue more from a game design than game implementation point of view.
Out of his three points, motion tracking, and the challenges posed by it, is the one most closely related to my own interests. The separation of viewing direction, aiming direction (as related to shooting games) and movement direction is something that falls naturally out of 3D tracking, and that needs to be implemented in VR applications or games at a fundamental level. Specifically, aiming using a tracked input device does, in my opinion, not work in the canonical architecture set up by existing desktop or console shooter games (see video below for an example).
My main concern with James’ post is the uncritical mention of the Razer Hydra controller. We are using those successfully ourselves (that’s a topic for another post), but it needs to be pointed out that we are using them differently than other tracked controllers. This is due to their lack of global precision: while the controllers are good at picking up relative motions (relative to their previous position, that is), they are not good at global positioning. What I mean is that the tracking coordinate system of the Hydra is non-linearly distorted, a very common effect with magnetic 3D trackers (also see Polhemus Fastrak or Ascension Flock of Birds for old-school examples). It is possible to correct for this non-linear distortion, but the problem we observed with the Hydra is that the distortion changes over relatively short time frames. What this means is that the Hydra is best not used as a 1:1 input device, where the position of the device in virtual space exactly corresponds to the position of the device in real space (see video below for how that works and looks like), but as an indirect device. Motions are still tracked more or less 1:1, but the device’s representation is offset from the physical device, and by a significant amount to prevent confusion. This has a direct impact on usability: instead of being able to use the physical device itself as an interaction cursor, embodying the “embodiment” principle (pun intended), the user has to work with an explicit virtual representation of the device instead. It still works (very well in fact), but it is a step down in immersion and effectiveness from globally-tracked input devices, such as the optically tracked Wiimote used in our low-cost VR system design.
And just because it’s topical and I’m a really big fan of Descent (after all, it is the highest form of patriotism!), here’s that old chestnut again:
Note how the CAVE wand is used as a “virtual gun,” and how the virtual gunsights are attached directly to the physical controller itself, not to a virtual representation of the physical controller. As far as the user is concerned, the CAVE wand is the gun. (The slight offset between controller and target reticle is primarily due to problems when setting up a CAVE for filming). This globally-precise tracking comes courtesy of the high-end Intersense IS-900 tracking system used in our CAVE, but we achieve the same thing with a (comparatively) low-cost NaturalPoint OptiTrack optical tracking system. The Hydra is a really good input device if treated properly, but it’s not the same thing.
I’ve already mentioned KeckCAVES‘ involvement in NASA‘s newest Mars mission, the Mars Science Laboratory, in a previous post, but now I have an update. Dawn Sumner, UC Davis‘ member of the Curiosity science team, was interviewed last week for “Onward California,” which I guess is some new system-wide outreach and public relations effort to get the public’s mind off last fall’s “unpleasantries.” Just kidding UC, you know I love you.
Anyway… Dawn decided that the best way to talk about her work on Mars would be to do the interview in the CAVE, showing how our software, particularly Crusta Mars, was used during the planning stages of the mission, specifically landing site selection. I then suggested that it would be really nice to do part of the interview about the rover itself, using a life-size and high-resolution 3D model of the rover. So Dawn went to her contacts at the Jet Propulsion Laboratory, and managed to get us a very detailed 3D model, made of several million polygons and high-resolution textures, to load into the CAVE.
What someone posing with a life-size 3D model of the Mars Curiosity rover might look like.
As it so happens, I have a 3D mesh viewer that was able to load and render the model (which came in Alias|Wavefront OBJ format), with some missing features, specifically no specularity and bump mapping. The renderer is fast enough to draw the full, undecimated mesh at sufficient frame rate for immersive display, around 30 frames per second.
The next problem, then, was how to film the beautiful rover model in the CAVE without making it look like garbage, another topic about which I’ve posted before. The film team, from the Department of the 4th Dimension, fortunately was on board, and filmed the interview in several segments, using hand-held and static camera setups.
We have pretty much figured out how to film hand-held video using a secondary head tracker attached to the camera, but static setups where the camera is outside the CAVE, and hence outside the tracking system’s range, always take a lot of trial and error to set up. For good video quality, one has to precisely measure the 3D position of the camera lens relative to the CAVE and then configure that in the CAVE software.
Previously, I used to do that by guesstimating the camera position, entering the values into the configuration file, and then using a Vrui calibration utility to visually judge the setup’s correctness. This involves looking at the image and why it’s wrong, mentally changing the camera position to correct for the wrongness, editing the configuration file, and repeating the whole process until it looks OK. Quite annoying that, especially if there’s an entire film crew sitting in the room checking their watches and rolling their eyes.
After that filming session, I figured that Vrui could use a more interactive way of setting up CAVE filming, a user interface to set up and configure several different filming modes without having to leave a running application. So I added a “filming support” vislet, and to properly test it, filmed myself posing and playing with the Curiosity rover (MSL Design Courtesy NASA/JPL-Caltech):
Pay particular attention to the edges and corners of the CAVE, and how the image of the 3D model and the image backdrop seamlessly span the three visible CAVE screens (left, back, floor). That’s what a properly set up CAVE video is supposed to look like. Also note that I set up the right CAVE wall to be rendered for my own point of view, in stereo, so that I could properly interact with the 3D model and knew what I was pointing at. Without such a split-CAVE setup, it’s very hard to use the CAVE when in filming mode.
The filming support vislet supports head-tracked recording, static recording, split-CAVE recording (where some screens are rendered for the user, and some for the camera), setting up custom light sources, and a draggable calibration grid and input device markers to simplify calibrating a static camera setup when the camera is outside the tracking system’s range and cannot be measured directly.
All in all, it works quite well, and is a significant improvement over the previous setup method. It is now possible to change filming modes and camera setups from within a running application, without having to exit, edit configuration files, and restart.
While I was in Santa Barbara recently to install a low-cost VR system, I also took the chance to visit the Allosphere. One of the folks behind the Allosphere is Tobias Höllerer, a computer science professor at UCSB who I’ve known for a number of years; on this visit, I also met JoAnn Kuchera-Morin, the director of the Allosphere Research Facility, and Matthew Wright, the media systems engineer.
Allosphere Hardware
The Allosphere is an audacious design for a VR environment: a sphere ten meters in diameter, completely illuminated by more than a dozen projectors. Visitors stand on a bridge crossing the sphere at the equator, five meters above ground. While I did take my camera, I forgot to take good pictures; Figure 1 is a pretty good impression of what the whole affair looks like.
Figure 1: What the Allosphere kinda looks like. Image taken from the Marvel Movies Wiki.
Earlier this year, I branched out into augmented reality (AR) to build an AR Sandbox:
Photo of AR Sandbox, with a central “volcano” and several surrounding lakes. The topographic color map and contour lines are updated in real time as the real sand surface is manipulated, and virtual water flows over the real sand surface realistically.
I am involved in an NSF-funded project on informal science education for lake ecosystems, and while my primary part in that project is creating visualization software to drive 3D displays for larger audiences, creating a hands-on exhibit combining a real sandbox with a 3D camera, a digital projector, and a powerful computer seemed like a good idea at the time. I didn’t invent this from whole cloth; the project got started when I saw a video of such a system done by a group of Czech students on YouTube. I only improved on that design by adding better filters, topographic contour lines, and a physically correct water flow simulation.
The idea is to have these AR sandboxes as more or less unsupervised hands-on exhibits in science museums, and allow visitors to informally learn about geographical, geological, and hydrological principles by playing with sand. The above-mentioned NSF project has three participating sites: the UC Davis Tahoe Environmental Research Center, the Lawrence Hall of Science, and the ECHO Lake Aquarium and Science Center. The plan is to take the current prototype sandbox, turn it into a more robust, museum-worthy exhibit (with help from the exhibit designers at the San Francisco Exploratorium), and install one sandbox each at the three sites.
But since I published the video shown above on YouTube, where it went viral and gathered around 1.5 million views, there has been a lot of interest from other museums, colleges, high schools, and private enthusiasts to build their own versions of the AR sandbox using our software. Fortunately, the software itself is freely available and runs under Linux and Mac OS X, and all the hardware components are available off-the-shelf. One only needs a Kinect 3D camera, a data projector, a recent-model PC with a good graphics card (Nvidia GeForce 480 et al. to run the water simulation, or pretty much anything with water turned off) — and an actual sandbox, of course.
In order to assist do-it-yourself efforts, I’ve recently created a series of videos illustrating the core steps necessary to add the AR component to an already existing sandbox. There are three main steps: two to calibrate the Kinect 3D camera with respect to the sandbox, and one to calibrate the data projector with respect to the Kinect 3D camera (and, by extension, the sandbox). These videos elaborate on steps described in words in the AR Sandbox software’s README file, but sometimes videos are worth more than words. In order, these calibration steps are:
Step 1 is optional and will get a video as time permits, and steps 3, 6, and 8 are better explained in words.
Important update: when running the SARndbox application, don’t forget to add the -fpv (“fix projector view”) command line argument. Without it, the SARndbox won’t use the projector calibration matrix that you so carefully calibrated in step 7. It’s in the README file, but apparently nobody ever reads that. 😉
The only component that’s completely left up to each implementer is the sandbox itself. Since it’s literally just a box of sand with a camera and projector hanging above, and since its exact layout depends a lot on its intended environment, I am not providing any diagrams or blueprints at this point, except a few photos of our prototype system.
Basically, if you already own a fairly recent PC, a Kinect, and a data projector, knock yourself out! It should be possible to jury-rig a working system in a matter of hours (add 30 minutes if you need to install Linux first). It’s fun for the whole family!
So you just built yourself a CAVE. Or maybe you already have one, but you just finished implementing an awesome CAVE application. Either way, you want to tell the world about your achievement. You can invite people to come over and experience it, and while that’s the best way of going about it, you can only reach a handful of people.
So what do you do? Well, you make a movie of course. A movie can be seen by millions of people, and they can all see how awesome CAVEs are. Just one tiny little problem: how do you actually go about filming that movie?
The most obvious approach is to take a video camera, fire up the CAVE, put someone in there, point, and shoot. Since the CAVE’s walls are projection screens, the camera will record what’s on the walls, and that should be good enough, right? Well, I don’t think so. There are plenty of such videos out there, and I picked one more or less at random (no offense to whoever made this):
Now, I honestly don’t think this is convincing at all. If you haven’t already experienced a CAVE first hand, can you actually tell what’s going on? The images on the screens are blurry due to the stereoscopic display, severely distorted due to head-tracked rendering, and move and wobble around as the user moves in the CAVE. It is impossible to tell what the 3D model displayed in this CAVE really looks like, and I believe it is impossible to understand — for a lay audience — what the person in the CAVE is actually experiencing. The user being all “woo” and “aah” and “awesome” doesn’t really help either — looking at this with a cynical eye, you’d rightfully feel someone is trying to pull wool over your eyes. If I didn’t already know better, and saw this video, I wouldn’t be keen on seeing a CAVE in person. It looks rather lame and headache-inducing, to be honest.
So what’s the mistake? A CAVE works because the images on the screens are generated specifically for the person viewing them, which is why positional head tracking is a required ingredient for any CAVE (and why CAVEs are in principle single-user environments). But in this case, the person in the CAVE is not the intended audience: the people watching the movie are the audience. The solution is very simple: instead of head-tracking the user in the CAVE, you have to head-track the camera. And turn off stereoscopy while you’re at it, because the video camera is only monoscopic after all.
Here is one of my old movies, showing what that looks like:
This is a bit better. The movie is not particularly good quality (it’s old; I need to record a few new ones), but at least viewers can see what’s going on. The difference between this and the previous movie is that here the images are correctly projected onto the CAVE walls. Looking closely, you will see the seams where the walls meet, but you will also see that the 3D images cross those seams without being broken up or distorted. If you squint enough no longer to see the seams, it will seem as if the CAVE is one big flat screen. As a result, virtual 3D objects show up at their proper size and in proper relation to the real user in the CAVE. If the user touches a part of the data using the hand-held input device, this will show up properly in the video. In the latter parts, where a yellow “selection sphere” is attached to the input device, the sphere’s image in the video shows up in exactly the right place and size.
There are still two things wrong with this video: for one, it appears as if the user is having trouble working with the CAVE. We’ll address that later. The second issue is that the CAVE doesn’t look particularly dynamic. This is because the camera is on a tripod and doesn’t move throughout the movie (the movie only cuts between two different camera setups). One very strong depth cue that particularly applies to 2D video is motion parallax, where 3D objects move in a very particular way as the camera filming them is moved, and our brains are particularly good at picking up on that. Because the camera here doesn’t move, there is no motion parallax, and the CAVE looks somewhat “flat.”
This next movie addresses that issue by using a hand-held camera, which is still tracked by the CAVE as in the previous movie:
This looks a lot better. In fact, it looks so convincing that I have gotten many questions asking how I made the video to be 3D. Answer is, of course, that it’s not a 3D movie; it’s a regular 2D movie exploiting motion parallax. The trick is that I’m moving the camera as much as I can, to show how the virtual 3D objects appear to move in the exact same particular way as the real objects (in this case the user). Real filmmakers would tell me to cool it, but in this case egregious camera movement is a necessary evil. While I’m panning the camera, the virtual and real objects move in exactly the same way; in other words, the virtual objects appear real, which is exactly how and why a CAVE works.
But even this does not address the remaining issue: the 3D interactions captured in these movies seem awkward, as if the users didn’t know what they were doing, or, worse, as if a CAVE or VR in general were very hard to use, and not particularly effective. I call this the catch-22 of filming VR. Above I mentioned that in a CAVE, the images on the walls are generated specifically for one viewer, in order to appear real. But in these movies, the images are generated for the camera — and not even in stereo, to boot.
This means the actual user in the movies does not see the virtual objects properly, and is essentially flying blind. That’s the reason why the interactions here look awkward. Instead of simply being able to touch a virtual object as if it were real and then interact with it, the poor user has to judge his or her actions against the feedback of the generated images (which, from his or her perspective, don’t look like real objects at all), and adjust accordingly. This is why it was so hard to properly measure a distance on the globe in the second video, it was basically pointing trial-and-error.
So the choice seems to be: let the user in the CAVE be the “main” viewer, allowing them to interact properly and fluently, but create a movie that looks utterly unconvincing, or let the camera be the “main” viewer, capturing beautiful video, but giving the impression that CAVEs are hard to use. If you want to communicate that CAVEs are awesome to look at and easy to use, that’s a lose-lose situation.
Or at least that’s what I thought, until a member of the KeckCAVES group applied some lateral thinking and suggested to “split” the CAVE: on half of the screens, show the images from the user’s point of view; on the other half, show them from the camera’s point of view. Then, if the user only looks at the first half, and the camera only looks at the second half, you can capture good-looking video with fluent interactions. The only thing left for me to do was say “D’oh” and do it right away. Here’s one of the early videos showing this new approach:
This is more like it. For this particular setup, I only set up the right CAVE wall to render for the camera, and left the other three screens (back and left wall and floor) for myself. I put the camera on a tripod and aimed it straight at the right wall, and stood at the very edge of the CAVE to give the camera the best possible view. You’ll notice how I misaimed a bit: at the left edge of the video, the camera is capturing some of the user-centered stereo projection on the back wall, and it looks weird. But it’s not bad enough to warrant a complete re-shoot.
Now, unfortunately this means we’re back to static non-moving cameras. In this particular case, I shot the whole movie by myself, meaning I couldn’t have done hand-held anyway, but I’m not quite sure how to do hand-held in this setup. While moving the camera around, it will naturally capture more than one screen unless one is very careful, and if the camera sees one of the for-user screens, the illusion will break down. In short, I’m not sure. I guess the best compromise for now is to film two versions of the same movie and intercut them (like I did for the LiDAR Viewer movie): one with a hand-held camera to show how a CAVE looks, and one with a split CAVE and fixed camera to show how interactions work. With some clever editing, that could create stellar results — but I haven’t tried it yet, primarily for lack of time. Capturing good CAVE video is not quick.
When it comes to VR in the public’s mind, it’s all about the hardware. And that’s understandable, when there’s all that new and shiny tech out there: the Oculus Rift, the Leap Motion Leap, the Razer Hydra, the newly-announced Sony HMZ-T2 (couldn’t find an actual Sony link), you name it. But with that comes the unstated assumption that the hardware is all you need, that if you just buy the gadget, it will somehow work on its own. And at least when it comes to VR, that’s simply not the truth. Without proper software running it, the gadget is nothing but a glorified paperweight (of course the reverse is just as true, but I’m a software guy, so there).
The emphasis here is on proper software. Because all that shiny tech that came out in the past, and that nobody remembers (or tries to purge from their minds — remember the Virtual Boy? You’re welcome!), it all came with software. Just not software anybody was willing to use.
So first, I’ll tell you what’s necessary for VR to work well. For VR to work well, you need display technology that gives you an image both your brain and eye are happy with. Trust me, that’s much harder than you think. Even if it was just a HUD, people wouldn’t be that happy, because you’re always moving. Your head is never still. And this is moving relative to the world, and if your brain is trying to fuse it, that can be rather tiresome. I’ll tell you there are lots of issues with getting that image up in front of you.
I couldn’t agree more. Here’s what I have to add to this statement: as a game developer, Mr. Abrash should not have to worry about it in the first place. Should game developers worry about implementing the projective geometry and arithmetic necessary to turn triangles forming a 3D world into pixels on a screen in massively-parallel special-purpose silicon? No, that’s what OpenGL or Direct3D are for. Should game developers worry about how to scan the hardware of a keyboard to read key presses, or how to safely send data packets across a heterogeneous network of interconnected computers? No, that’s what the operating system is for.
Along the same lines, someone else should have to worry about how to properly display a 3D virtual world on a head-mounted display so that it looks correct and doesn’t cause eye strain or nausea, because that’s really hard, and really important. And while the Michael Abrashes and John Carmacks of this world can surely do it, others will get it wrong. I know that because others have been getting it wrong, for going on twenty years now. And it’s the wrong approaches that sour people of the whole VR idea.
But the problem is that, at this time, game developers still have to worry about it, because there is not an equivalent to OpenGL for VR yet, in the sense that it is a widely-accepted industry-standard toolkit that has all the functionality that’s required to build successful applications on it. Now, there are plenty of VR toolkits out there — and, for disclosure, I created one of them — but none fulfill these criteria. Let’s talk about that.
Like other support or middleware software, VR toolkits can work at several levels of abstraction. I’m going to use “standard” 3D graphics toolkits as analogies here, assuming that those who have read this far know about such things.
At the low level, we have things that are the equivalent of OpenGL itself, or the glut windowing toolkit built on top of it. These are things that give you minimum abstractions, and offload any higher-level functionality to individual applications. Take glut: it will open a display window for you (no easy task in itself), and allow you to query the mouse, but if you want to use the mouse to rotate your 3D scene in the window, you’re on your own, pal. Result: glut developers roll their own navigation interfaces, and if their actual goal is something besides navigation, and they just do the bare minimum, the results usually suck hard.
The equivalent to glut in the VR world would be a toolkit that opens windows for you and sets them up to do proper stereo, and gives you abstract input devices, typically represented as 4×4 homogeneous matrices. If you want to use those input devices to do anything, let’s hope you really grok projective geometry. The results are often, let’s say, somewhat glut-ish in nature.
The canonical example of a low-level VR toolkit is the cavelib, but there are many others. I want to mention one other, because I might catch flak for it: VR Juggler. Now I haven’t looked at version 3.0 yet, but in the VR Juggler I know, the above abstractions are what you get. There is a lot of work going on under the hood, with clever ways of dynamically managing input devices and displays etc., but in the end what you get is a number of set-up-for-3D windows, and a bunch of matrices. Everything else is up to you. Don’t get me wrong: I’m not saying that these toolkits are bad, I’m merely saying that they’re low-level. If low-level is what you want or need, these are for you.
On the other extreme, there are high-level toolkits (who’da thunk?). These are basically content creation and management engines, equivalent to things like commercial or open-source game engines, think id Tech, Unreal Engine, Ogre, Horde 3D, etc. These are very powerful and easy to use — at least relative to their feature sets — but they are written with a particular purpose in mind. You could probably tweak the Unreal Engine to do 3D visualization of volumetric data, but you’d really be better off not doing it.
The only high-level VR toolkit I know by more than just name is WorldViz, but I think it’s pretty canonical. It’s very easy to put together a 3D world with it, and show it on a wide variety of VR display devices, but if you have more specific needs, it will be so much harder to punch through the high abstraction layer to get to the guts you need to get to.
A quick secondary analogy: low-level is like raw X11, high level is like a certain office software suite, and the middle level is like gtk+ or Qt. You can see where I’m going: nobody has been writing apps in raw X11 for twenty years (with very good reason), and the really exciting part is in the middle, because developing apps in that unnamed office software suite is for code monkeys (that was a joke).
I haven’t seen many medium-level VR toolkits. In the non-VR world, scene graph toolkits like OpenSceneGraph or OpenSG would qualify for this level, but while there exist some VR embeddings of these toolkits, those are not quite standard, and — I believe — are still lacking in the input department.
It was this lack of medium-level software that led me to start my own VR toolkit back in the day. There’s much to be said about that, but it’s a topic for another post. For now, I just want to mention that what separates it from low-level are its built-in 3D interaction metaphors, such as navigation. If you want to rotate your scene with the mouse, you don’t have to reinvent the wheel. But if you do really want to make your own navigation metaphor, there’s an “official” way to do so — and that’s what separates it from high-level toolkits.
But back on topic. Why do I insist that game developers use VR middleware, instead of working on the bare metal themselves? I already mentioned that there’s the danger of getting it wrong, and having middleware that does it right prohibits that, but there’s another reason that holds even if all game developers do it right.
Games have been rolling their own user interfaces since day 1, and there’s a certain appeal to having vastly different looking interfaces in different games that fit with the visual style of each game, but there’s the thing: take away the skin, and they all work the same. You don’t have to read the manual to know how to navigate a game’s menu (or if you do, you should ask for your money back), and if you play certain genres, say first-person shooters, you know that they all use WASD+mouse, so you’re right at home. But imagine if games used functionally different interfaces. Simple example: imagine half of FPS games looking up when you push the mouse forward, and the other half looking down, and there being no way to change that. Now imagine you’re really good at one, and try the other. You’ll love it.
And that’s a problem in VR, because the number of potential ways of doing the same thing, multiplied by the number of fundamentally different input devices (gamepad? Wiimote? data glove? Kinect? else?) would lead to an explosion of mutually incompatible choices. Using a common middleware, which is based on tested and working interaction metaphors, and allows users to pick their own favorite metaphors out of a large pool and use them across all applications, would really help here.
To break up this Wall of Text, I’m going to throw in two related videos. Both show VR “games,” with somewhat different ways of incorporating the players’ bodies into the action. The first one is a pretty straight-up FPS. It’s decidedly old-school, being based on maps and models from 1997’s Descent (best game ever!), so look past the dated graphics and observe the seamless integration of the player, and the physical user interface, particularly the aiming. Keep in mind the catch-22 of VR: in order to film this, the user can’t see properly, which is why my aim is so poor. If done for real, it’s much better. Please watch both halves, the second (starting at 2:18) makes it clearer what’s going on in the first:
The second video also shows an FPS, at least on the surface, being based on maps from Doom 3. But the video is not only a lot more whimsical (feel free to roll your eyes), it also doesn’t feature shooting, and shows a larger variety of bodily interactions, including being able to draw free-handedly in 3D space for an ad-hoc noobs’ round of tic-tac-toe. It’s not a game, as it’s meant to show remote collaboration with virtual holograms, but it was a blast nonetheless, some hardware trouble notwithstanding:
Back to middleware, and the final issue: think configuring a desktop PC game is bad? With all the drivers and graphics options and knobs and twiddles, and FAQs on the web how to get it wide-screen etc.? VR is a hundred times worse, and on top of that, if you get it slightly wrong, it will make you sick. Now imagine you’ve just set it up perfectly in one game, and have to do it all over again for the next game, and the knobs and dials you have to twiddle are completely different. If there’s common middleware, you only have to do it once. Wouldn’t it be nice if same-genre games of today, like FPSs, would share mouse and keyboard settings at least? Or if you tell one to run at 1920×1080, the next one will, too? One can dream, right? Well, with a good medium-level toolkit, that is exactly what happens.
I am not proposing that all games should work exactly the same, not even games in the same genre. Even when using a medium-level toolkit with powerful built-in user interface features, there is still a huge amount of design space for individual games to establish their own look & feel, or provide special-purpose interaction metaphors — allowing that is the whole point of medium-level toolkits — but at least the fundamentals are strong.
I kept the best news for last: a good medium-level VR toolkit does not only work in actual VR, it also works splendidly on a desktop — in fact, an application based on a VR toolkit done right is functionally indistinguishable from a native desktop application. I have plenty of VR applications to prove it. That means that game developers will not have to make specific VR and desktop versions of their games. VR (or the desktop, depending on your perspective) will come for free.
So here’s my call to arms: now is the exactly right time to get going on that middleware thing. We can’t wait until great consumer-level VR hardware hits the mainstream market; the software has to be already there and ready the moment it does. The people making VR middleware, and the people who should be using it, should already be talking at this point. Are they?
I received an email about a week ago that reminded me that, even though stereoscopic movies and 3D graphics have been around for at least six decades, there are still some wide-spread misconceptions out there. Those need to be addressed urgently, especially given stereo’s hard push into the mainstream over the last few years. While, this time around, the approaches to stereo are generally better than the last time “3D” hit the local multiplex (just compare Avatar and Friday the 13th 3D), and the wide availability of commodity stereoscopic display hardware is a major boon to people like me, we are already beginning to see a backlash. And if there’s a way to do things better, to avoid that backlash, then I think it’s important to do it.
So here’s the gist of this particular issue: there are primarily two ways of setting up a movie camera, or a virtual movie camera in 3D computer graphics, to capture stereoscopic images — one is used by the majority of existing 3D graphics software, and seemingly also by the “3D” movie industry, and the other one is correct.
Toe-in vs skewed frustum
So, how do you set up a stereo camera? The basic truth is that stereoscopy works by capturing two slightly different views of the same 3D scene, and presenting these views separately to the viewers’ left and right eyes. The devil, as always, lies in the details.
Say you have two regular video cameras, and want to film a “3D” movie (OK, I’m going to stop putting “3D” in quotes now. My pedantic point is that 3D movies are not actually 3D, they’re stereoscopic. Carry on). What do you do? If you put them next to each other, with their viewing directions exactly parallel, you’ll see that it doesn’t quite give the desired effect. When viewing the resulting footage, you’ll notice that everything in the scene, up to infinity, appears to float in front of your viewing screen. This is because the two cameras, being parallel, are stereo-focused on the infinity plane. What you want, instead, is that near objects float in front of the screen, and that far objects float behind the screen. Let’s call the virtual plane separating “in-front” and “behind” objects the stereo-focus plane.
So how do you control the position of the stereo-focus plane? When using two normal cameras, the only solution is to rotate both slightly inwards, so that their viewing direction lines intersect exactly in the desired stereo-focus plane. This approach is often called toe-in stereo, and it sort-of works — under a very lenient definition of the words “sort-of” and “works.”
The fundamental problem with toe-in stereo is that it makes sense intuitively — after all, don’t our eyes rotate inwards when we focus on nearby objects? — but that our intuition does not correspond to how 3D movies are shown. 3D (or any other kind of) movies are not projected directly onto our retinas, they are projected onto screens, and those screens are in turn viewed by us, i.e., they project onto our retinas.
Now, when a normal camera records a movie, the assumption is that the movie will later be projected onto a screen that is orthogonal to the projector’s projection direction, which is implicitly the same as the camera’s viewing direction (the undesirable effect of non-orthogonal projection is called keystoning). In a toe-in stereo camera, on the other hand, there are two viewing directions, at a slight angle towards each other. But, in the theater, the cameras’ views are projected onto the same screen, meaning that at least one, but typically both, of the component images will exhibit keystoning (see Figures 1 and 2).
Figure 1: The implied viewing directions and screen orientations caused by a toe-in stereo camera based on two on-axis projection cameras. The discrepancy between the screen orientations implied by the cameras’ models and the real screen causes keystone distortion, which leads to 3D convergence issues and eye strain.
Figure 2: The left stereo image shows the keystoning effect caused by toe-in stereo. A viewer will not be able to merge these two views into a single 3D object. The right stereo image shows the correct result of using skewed-frustum stereo. You can try for yourself using a pair of red/blue anaglyphic glasses.
The bad news is that keystoning from toe-in stereo leads to problems in 3D vision. Because the left/right views of captured objects or scenes do not actually look like they would if viewed directly with the naked eye, our brains refuse to merge those views and perceive the 3D objects therein, causing a breakdown of the 3D illusion. When keystoning is less severe, our brains are flexible enough to adapt, but our eyes will dart around trying to make sense of the mismatching images, which leads to eye strain and potentially headaches. Because keystoning is more severe towards the left and right edges of the image, toe-in stereo generally works well enough for convergence around the center of the images, and generally breaks down towards the edges.
And this is why I think a good portion of current 3D movies are based on toe-in stereo (I haven’t watched enough 3D movies to tell for sure, and the ones I’ve seen were too murky to really tell): I have spoken with 3D movie experts (an IMAX 3D film crew, to be precise), and they told me the two basic rules of thumb for good stereo in movies: artificially reduce the amount of eye separation, and keep the action, and therefore the viewer’s eyes, in the center of the screen. Taken together, these two rules exactly address the issues caused by toe-in stereo, but of course they’re only treating the symptom, not the cause. As an aside: when we showed this camera crew how we are doing stereo in the CAVE, they immediately accused us of breaking the two rules. What they forgot is that stereo in the CAVE obviously works, including for them, and does not cause eye strain, meaning that those rules are only workarounds for a problem that doesn’t exist in the first place if stereo is done properly.
So what is the correct way of doing it? It can be derived by simple geometry. If a 3D movie or stereo 3D graphics are to be shown on a particular screen, and will be seen by a viewer positioned somewhere in front of that screen, then the two viewing volumes for the viewer’s eyes are exactly the two pyramids defined by each eye, and the four corners of the screen. In technical terms, this leads to skewed-frustum stereo. The following video explains this pretty well, better than I could here in words or a single diagram, even though it is primarily about head tracking and the screen/viewer camera model:
In a nutshell, skewed-frustum stereo works exactly as ordered. Even stereo pairs with very large disparity can be viewed without convergence problems or eye strain, and there are no problems when looking towards the edge of the image.
To allow for a real and direct comparison, I prepared two stereoscopic images (using red/blue anaglyphic stereo) of the same scene from the same viewpoint and with the same eye separation, one using toe-in stereo, one using skewed-frustum stereo. They need to be large and need to be seen at original size to appreciate the effect, which is why I’m only linking them here. Ideally, switch back-and-forth between the images several times and focus on the structure close to the upper-left corner. The effect is subtle, but noxious:
I generated these using the Nanotech Construction Kit and Vrui; as it turns out, Vrui is flexible enough to support bad stereo, but at least it was considerably harder setting it up than good stereo. So that’s a win, I guess.
There are only two issues to be aware of: for one, objects at infinity will have the exact separation of the viewer’s eyes, so if the programmed-in eye separation is larger than the viewer’s actual eye separation, convergence for very far away objects will fail (in reality, objects can’t be farther away than infinity, or at least our brains seem to think so). Fortunately, the distribution of eye separations in the general population is quite narrow; just stick close to the smaller end. But it’s a thing to keep in mind when producing stereoscopic images for a small screen, and then showing them on a large screen: eye separation scales with screen size when baked into a video. This is why, ideally, stereoscopic 3D graphics should be generated specifically for the size of the screen on which they will be shown, and for the expected position of the audience.
The other issue is that virtual objects very close to the viewer will appear blurry. This is because when the brain perceives an object to be at a certain distance, it will tell the eyes to focus their lenses to that distance (a process called accommodation). But in stereoscopic imaging, the light reaching the viewer’s eyes from close-by virtual objects will still come from the actual screen, which is much farther away, and so the eyes will focus on the wrong plane, and the entire image will appear blurry.
Unfortunately, there’s nothing we can do about that right now, but at least it’s a rather subtle effect. In our CAVE, users standing in the center can see virtual objects floating only a few inches in front of their eyes quite clearly, even though the walls, i.e., the actual screens, are four feet away. This focus miscue does have a noticeable after-effect: after having used the CAVE for an extended period of time, say a few hours, the real world will look somewhat “off,” in a way that’s hard to describe, for a few minutes after stepping out. But this appears to be only a temporary effect.
Taking it back to the real 3D movie world: the physical analogy to skewed-frustum stereo is lens shift. Instead of rotating the two cameras inwards, one has to shift their lenses inwards. The amount of shift is, again, determined by the distance to the desired stereo-focus plane. Technically, creating lens-shift stereo cameras should be feasible (after all, lens shift photography is all the rage these days), so everybody should be using them. And some 3D movie makers might very well already do that — I’m not a part of that crowd, but from what I hear, at least some don’t.
In the 3D graphics world, where cameras are entirely virtual, it should be even easier to do stereo right. However, many graphics applications use the standard camera model (focus point, viewing direction, up vector, field-of-view), and can only represent non-skewed frusta. The fact that this camera model, as commonly implemented, does not support proper stereo, is just another reason why it shouldn’t be used.
So here’s the bottom line: Toe-in stereo is only a rough approximation of correct stereo, and it should not be used. If you find yourself wondering how to specify the toe-in angle in your favorite graphics software, hold it right there, you’re doing it wrong. The fact that toe-in stereo is still used — and seemingly widely used — could explain the eye strain and discomfort large numbers of people report with 3D movies and stereoscopic 3D graphics. Real 3D movie cameras should use lens shift, and virtual stereoscopic cameras should use skewed frusta, aka off-axis projection. While the standard 3D graphics camera model can be generalized to support skewed frusta, why not just replace it with a model that can do it without additional thought, and is more flexible and more generally applicable to boot?
Update: With the Oculus Rift in developers’ hands now, I’m getting a lot of questions about whether this article applies to head-mounted displays in general, and the Rift specifically. Short answer: it does. There isn’t any fundamental difference between large screens far away from the viewer, and small screens right in front of the viewer’s eyes. The latter add a wrinkle because they necessarily need to involve lenses and their concomitant distortions so that viewers are able to focus on the screens, but the principle remains the same. One important difference is that small screens close to the viewer’s eyes are more sensitive to miscalibration, so doing stereo right is, if anything, even more important than on large-screen displays. And yes, the official Oculus Rift software does use off-axis projection, even though the SDK documentation flat-out denies it.
So what’s wrong with the canonical 3D graphics camera model? To recap, in this model a camera is defined by a focus point (the “eye”), a viewing direction, an “up” vector, a screen aspect ratio, and a field-of-view angle (“fov”) (see Figure 1). Throw in a near- and far-plane distance, and together these parameters uniquely define a viewing frustum in model space, and hence the modelview and projection matrices required to render a view of a 3D scene. Nothing wrong with that, per se.
Figure 1: The standard 3D graphics camera model, defined by a focus point position, viewing direction, “up” vector, and screen aspect ratio (ratio of screen width to screen height, not shown in diagram).
The problem arises when this same camera model is applied to (semi-) immersive environments, such as when one wants to adapt an existing graphics package or game engine to, say, a 3D TV or a head-mounted display with only minimal changes. There are two main problems with that: for one, the standard camera model does not support proper stereo image generation, leading to 3D vision problems, eye strain, and discomfort (but that’s a topic for another post).
The problem I want to discuss here is the implicit link between the camera model and viewpoint navigation. In this context, viewpoint navigation is the mechanism by which a 3D graphics application represents the viewer moving through the virtual 3D environment. For example, in a typical first-person video game, the player will be represented in the game world as some kind of avatar, and the camera model will be attached to that avatar’s head. The game engine will provide some mechanism for the player to directly control the position and viewing direction of the avatar, and therefore the camera, in the virtual world (this could be the just-as-canonical WASD+mouse navigation metaphor, or something else). But no matter the details, the bottom line is that the game engine is always in complete control of the player avatar’s — and the camera’s — position and orientation in the game world.
But in immersive display environments, where the user’s head is tracked inside some tracking volume, this is no longer true. In such environments, there are two ways to change the camera position: using the normal navigation metaphor, or simply physically moving inside the tracking volume. Obviously, the game engine has no way to control the latter (short of tethers or an electric shock collar). The problem is that the standard camera model, or rather its implementation in common graphics engines, does not account for this separation.
This is not really a technical problem, as there are ways to manipulate the camera model to yield the correct end result, but it’s a thinking problem. Having to think inside this ill-fitting camera model causes real headaches for developers, who will be running into lots of detail problems and edge cases when trying to implement correct camera behavior in immersive environments.
My preferred approach is to use an entirely different way to think about navigation in virtual worlds, and the camera model that directly follows from it. In this paradigm, a display system is not represented by a virtual camera, but by a physical display environment consisting of a collection of screens and viewers. For example, a typical desktop system would consist of a single screen (the actual monitor), and a single viewer (the user) sitting in a fixed position in front of it (fixed because typical desktop systems have no way to detect the viewer’s actual position). At the other extreme, a CAVE environment would consist of four to six large screens in fixed positions forming a cube, and a viewer whose position and orientation is measured in real time by a head tracking system (see Figure 2). The beauty is that this simple environment model is extremely flexible; it can support any number of screens in arbitrary positions, including moving screens, and any number of fixed or tracked viewers. It can support non-rectangular screens without problems (but that’s a topic for another post), and non-flat screens can be tesselated to a desired precision. So far, I have not found a single concrete display environment that cannot be described by this model, or at least approximated to arbitrary precision.
Figure 2: Photo of a CAVE environment consisting of four screens (three walls and one floor) and one viewer (in this case a camera on a tripod). Note how the image of the 3D protein model in the CAVE spans all four screens, but still appears seamless to the camera.
In more detail, a screen is defined by its position, orientation, width, and height (let’s ignore non-rectangular screens for now). A viewer, on the other hand, is solely defined by the position of its two eyes (two eyes instead of one to support proper stereo; sorry, spiders and Martians need not apply). All screens and viewers forming one display environment are defined in the same coordinate system, called physical space because it refers to real-world entities, namely display screens and users.
How does this environment model affect navigation? Instead of moving a virtual camera through virtual space, navigation now moves an entire environment, i.e., a collection of any number of screens and viewers, through the virtual space, still under complete program control (fans of Dr Who are free to call it the “Tardis model”). Additionally, any viewers can freely move through the environment, at least if they’re head-tracked, and this part is not under program control. From a mathematical point of view, this means that viewers can freely walk through physical space, whereas physical space as a whole is mapped into the virtual world by the graphics engine, effected by the so-called navigation transformation.
At first glance, it seems that this model does nothing but add another intermediate coordinate system and is therefore superfluous (and mathematically speaking, that’s true), but in my experience, this model makes it a lot more straightforward to think about navigation and user motion in immersive environments, and therefore makes it easier to develop novel and correct navigation metaphors that work in all circumstances. The fact that it treats all possible display environments from desktops to HMDs and CAVEs in a unified way is just a welcome bonus.
The really neat effect of this environment model is that it directly implies a camera model as well (see Figure 3). Using the standard model, it is quite a tricky prospect to maintain the collection of virtual cameras that are required to render to a multi-screen environment, and ensure that they correspond to desired viewpoint changes in the virtual world, and the viewer’s motion inside the display environment. Using the viewer/screen model, there is no extra camera model to maintain. It turns out that a viewing frustum is also uniquely identified by a combination of a flat (rectangular) screen, a focus point position, and near- and far-plane distances. However, the first two components are directly provided by the environment model, and the latter two parameters can be chosen more or less arbitrarily. As a result, the screen/viewer model has no free parameters to define a viewing frustum besides the two plane distances, and the resulting viewing frusta will always lead to correct projections, which are also automatically seamless across multiple screens (but that’s a topic for another post).
Figure 3: The screen/viewer camera model defined by the position, orientation, and size of a screen, and the position of a focus point, in some 3D coordinate system. Besides the additional near- and far-plane distances, the model has no free parameters besides those that can be measured directly via calibration and head tracking.
Looking at it mathematically again, one screen/viewer pair uniquely defines a viewing frustum in the physical coordinate space in which the screen and viewer are defined, and hence a modelview and a projection matrix. Now, the mapping from physical space to virtual world space is typically also expressed as a matrix, meaning that this model really just adds yet another modelview matrix. And since the product of two matrices is a matrix, it boils down to the same projection pipeline as the standard model. As I mentioned earlier, the model does not introduce any new capabilities, it just makes it easier to think about the existing capabilities.
So the bottom line is that the viewer/screen model makes it simpler to reason about program-controlled navigation, completely removes the need for an explicit camera model and the extra work required to keep it consistent with the display environment, and — if the display environment was measured properly — automatically leads to distortion-free and seamless images even across multiple screens, and to always correct and eye strain-free stereo displays.
Although this model stems from the immersive environment world, applying it in the desktop realm has immediate practical benefits. For one, it supports proper stereo without extra work from the application developer; additionally, it supports flexible multi-display configurations where users can put their displays however they like, and get correct and seamless images without special application support. It even provides correct desktop head-tracking for free. Sounds like a win-win to me.


